The Many Ways to Shape Challah
Much of the following information, as well as pictures, comes from http://theshiksa.com/.
Braids
Challah bread is often shaped into braided loaves.
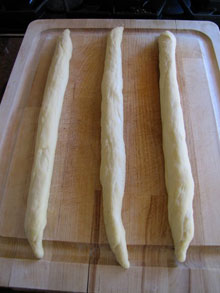
To create stands, take one of the portions and roll it out with a rolling pin until it is flat and about 1/4 inch thick. Don’t worry about the shape of the dough, it doesn’t matter. Using both hands, put pressure on the rolling surface and pull the dough back towards you, rolling it back into a strand shape. Keep even pressure on the dough as you roll so that no air pockets collect in the strand. Once your strand shape is created, roll it back and forth with both hands to erase the seams and smooth out the strand. As you roll, angle your hands outward and apply gentle pressure to taper the dough on the outer edges. By doing this, your strand should end up slightly thicker in the middle and thinner on the ends. This will help make your braided challah tapered at the ends.
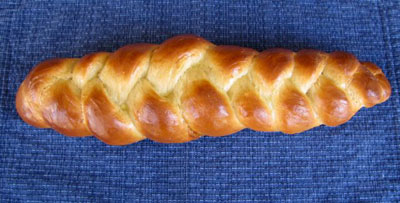
3-Strand Braided Challah
This is the easiest way to braid a challah. For those of you who know how to braid hair, this should come naturally to you. Some people start the braid in the middle of the strands instead of the top because it gives the challah a more even, balanced shape. This is the technique used below.
The important thing to remember when braiding a Three-Strand Challah is to be aware of your middle strand. Each strand of dough will take a turn being the middle strand; keeping your eye on the middle strand will help you stay on track as you braid.
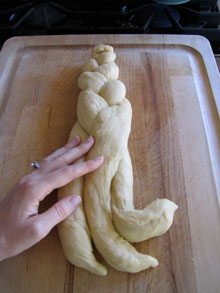
Create three equal-size strands. They should be about 12 inches long and 1 1/2 inches wide for a normal size loaf. Lay the three strands side-by-side.
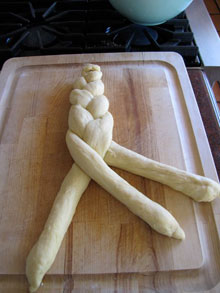
Grab the center of the right strand and cross it over the middle strand, drop it in the center. The right strand is now your middle strand.
Grab your left strand and cross it over the middle strand. The left strand becomes your middle strand.
Repeat steps 2 and 3 (right strand to middle, left strand to middle) until you have braided your challah to the very end. Pinch the three strands together at the end.
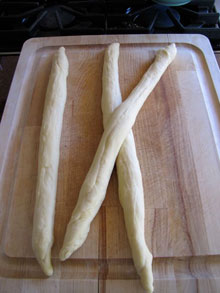
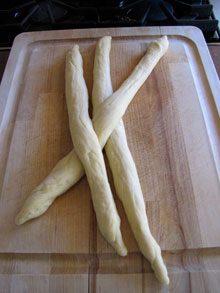
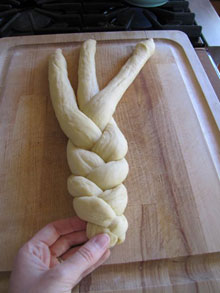
Grab the challah in the center…
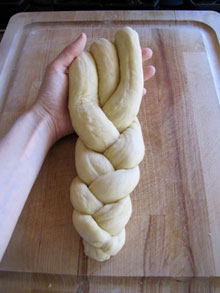
and flip it towards you so the challah is now upside down and the unbraided strands are facing downward.
Continue braiding by grabbing the left strand and crossing it over the middle strand. The left strand becomes your middle strand.
Grab the right strand and cross it over the middle strand, drop it in the center. The right strand is now your middle strand.
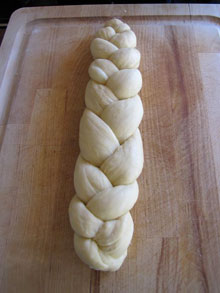
Repeat steps 6 and 7 (left strand to middle, right strand to middle) until your challah is fully braided. Pinch the ends of the loose strands together and tuck both the top and bottom tips of the challah under to create a nice rounded shape.
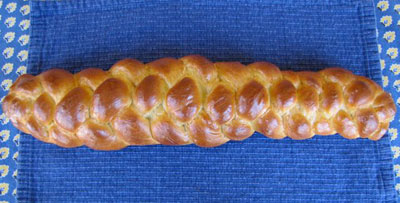
Brush with egg wash, then allow challah to rise.
4-Strand Braided Challah
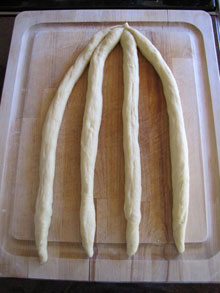
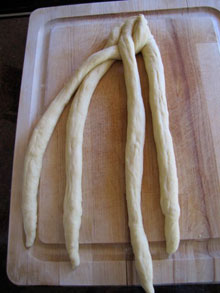
When braiding a Four-Strand Challah it's important to remember that you always start with the strand that is furthest to the right. Memorize the "over, under, over" pattern and say it out loud as you braid to keep you on track.
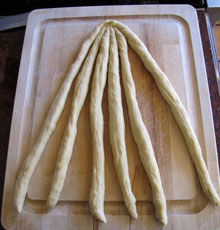
Create four equal-size strands. Lay the four strands side-by-side, then pinch them together so they are connected at the top. For braids that start with the strands being pinched together at the top (Four- and Six-Strand braids), pinch them somewhat loosely at the beginning of the braiding process. Once through braiding the bread, you can "unpinch" this top section so it can be re-braided into a tighter, neater braid. This gives a cleaner look to the challah overall.
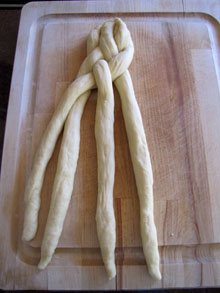
Take the strand furthest to the right and weave it towards the left through the other strands using this pattern: over, under, over.
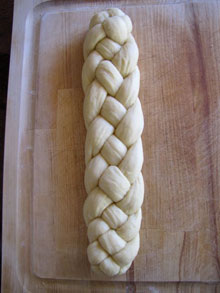
Take the strand furthest to the right and repeat the weaving pattern again: over, under, over. Repeat this pattern, always starting with the strand furthest to the right, until the whole loaf is braided.
Pinch the ends of the loose strands together and tuck them under on both ends of the challah loaf to create a nice shape.
Brush with egg wash, top if desired, then allow challah to rise.
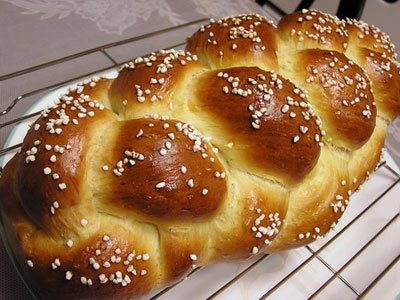
6-Strand Braided Challah
For braids that start with the strands being pinched together at the top (Four- and Six-Strand braids), pinch them somewhat loosely at the beginning of the braiding process. Once through braiding the bread, you can "unpinch" this top section so it can be re-braided into a tighter, neater braid. This gives a cleaner look to the challah overall.
Create six equal-size strands. Lay the six strands side-by-side, then pinch them together so they are connected at the top.
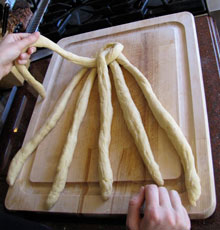
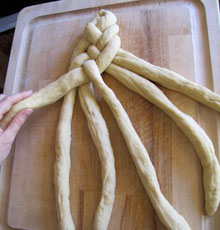
Take the strand furthest to the right and weave it towards the left through the other strands using this pattern: over 2 strands, under 1 strand, over 2 strands.
Take the strand furthest to the right and repeat the weaving pattern again: over 2 strands, under 1 strand, over 2 strands. Repeat this pattern, always starting with the strand furthest to the right, until the whole loaf is braided.
Pinch the ends of the loose strands together and tuck them under on both ends of the challah loaf to create a nice shape.
Brush with egg wash, top if desired, then allow challah to rise.
Double 3-Strand Braided Challah
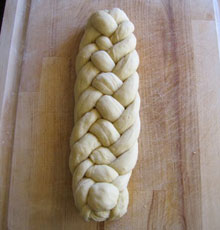
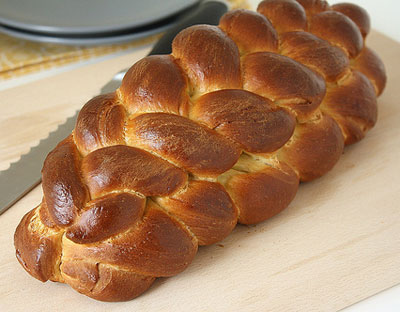
Turn the dough onto a lightly floured surface and divide into 2 pieces, one twice as big as the other. For example, my ball of dough weighted 27 oz so I divided into an 18 oz piece and a 9 oz piece.
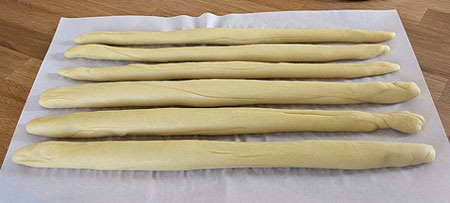
Divide each of those 2 pieces into 3 equal sized pieces. Roll each piece into a rope that is 16 inches long. You'll have three thicker ropes from the large piece of dough and three thinner ropes from the smaller piece.
Starting with the 3 larger strands of dough, follow the instructions above for creating a 3-Strand Braid.
Repeat with the 3 thinner strands to form a second, smaller braid.
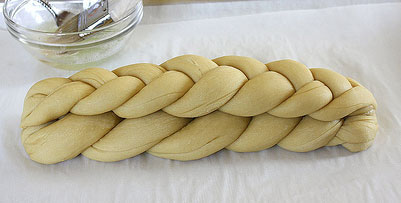
Transfer the larger braid to a sheet of parchment paper set in a rimmed baking sheet. Brush the top of the braid with the egg wash then place the smaller braid on top and press gently to secure it. Tuck the ends under on both sides of the loaf.
Rounds
It is the Jewish custom to eat round loaves on Rosh HaShana (Jewish New Year), often with added raisins or other sweet fruit to symbolize a sweet new year. The tradition of making the usual challah loaf round is to symbolize the continuation of the seasons, the cyclical nature of the year (among many other interesting ideas). The word for year, shana, comes from the Hebrew word repeat. On Rosh HaShana challah is dipped in honey (rather than salt) to symbolize hopes for a sweet New Year. Many continue eating round challahs until the end of Succos.
Unlike the traditional straight braid used for Shabbat dinners, challah for Rosh Hashanah is formed into a ring or linking loops to symbolize unity and strength at the start of the Jewish New Year.
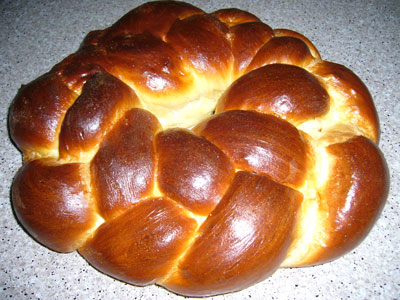
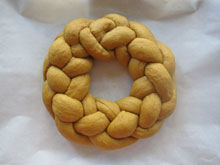
4-Strand Braided Ring Challah
Take remaining 2/3 of dough and use your palms to flatten it into a rough rectangle shape about 1 foot wide and 6-9 inches high.
Slice the dough rectangle into four long equal-sized strips.
Roll each strip into a long strand with tapered edges. For tips on rolling strands, see my How to Braid Challah blog. These strands will be extra long; between 2 1/2 and 3 feet is ideal. You will need to roll it in sections. Once rolled out, the strips will not fit on a standard cutting board.
Lay the four strands side-by-side, then loosely pinch them together so they are connected at the top.
Take the strand furthest to the right and weave it towards the left through the other strands using this pattern: over, under, over.
Take the strand furthest to the right and repeat the weaving pattern again: over, under, over.
Repeat this pattern, always starting with the strand furthest to the right, until you can no longer braid. Leave the bottom ends of the strands loose. Form the braided challah into a rough circular shape.
Unpinch the strands on the upper part of the challah (where you started braiding. You will end up with 8 loose strands at either end of the braid.
Braid the loose end strands together. I do this by attaching the strands that are opposite-- meaning, the top strand on the right side connects with the bottom strand on the left side, the second highest strand on the right side connects with the second lowest strand on the left, etc. You may need to attach two of the strands below the circular braid to create a neat appearance.
When all strands are attached, push the braid together gently and plump it to create a smooth connection.
Lift the braided challah circle gently and place it in the center of a parchment lined baking sheet. Plump it gently and reshape into a smooth circle, if needed.
Knotted Braided Ring
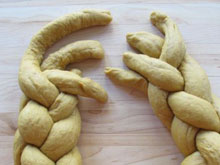
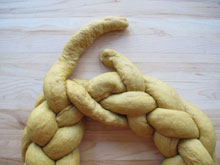
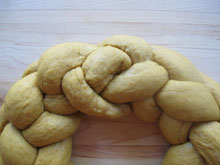
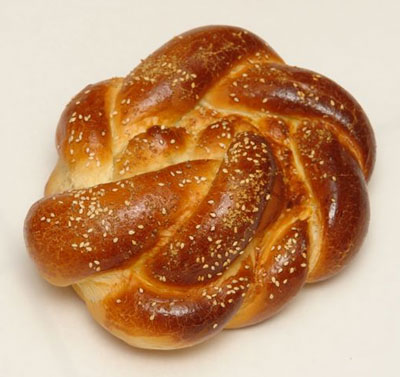
Here's a very nice, simple way to make beautiful round braided challahs. It comes out much nicer than a simple 'snail' shape, and really takes only minutes to put together. Anyone who can braid three strands can make this challah easily. Plus it rises and bakes nicer than a simpler knot or twist does.
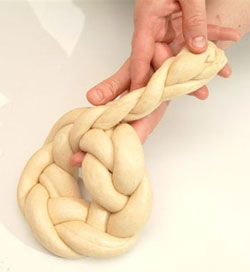
Begin by taking three long strands and braiding them into a very long havdalah–candle-shaped log.
After this long 'candle' has been braided, carefully tie it up as if you are making one large knot out of it, and leave it to rise. It will come out different than a simple round knot, and although not quite as extravagant as the woven round challah, it is still quite pretty.
Braided Round Challah
The following instructions come from Tamar Ansh's book A Taste of Challah.
This braiding method works equally well with large (three or four loaves per 2 kilos of flour - about 4.4 pounds) or small loaves, which make lovely gifts. Start by making your dough using your favorite recipe, and once the dough has risen and been punched down and ready for braiding, follow the steps below.
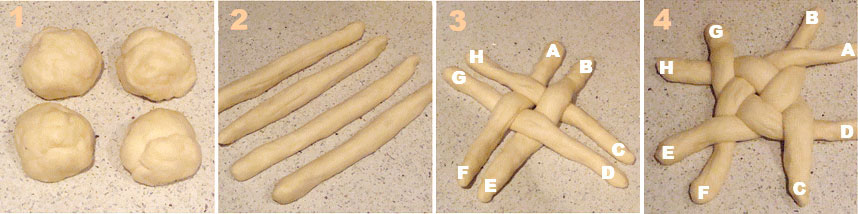
Step 1 and 2: Roll four balls of equally sized dough into long thin strips. I roll a strip like this by holding my hands chest height and rolling the ball between my hands to form a uniform strip.
Step 3: Arrange strips according to photo
Step 4: Working clockwise, cross A over B, C over D, E over F and G over H
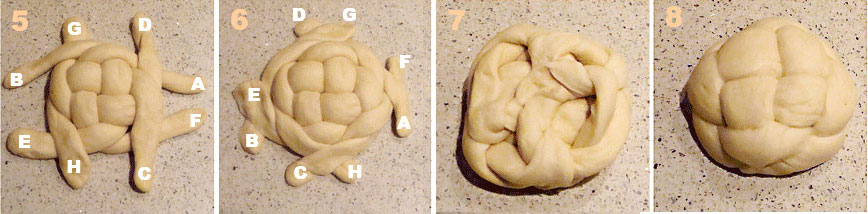
Step 5: Now working in the opposite direction, cross B over G, H over E, F over C (Whoops, the picture shows a mistake in the braiding, F should be over C) and D over A
Step 6: Now working clockwise once again, cross G over D, A over F, C over H and E over B. If you have more dough left to braid, repeat step 5.
Step 7: Pinch the ends together and bring up the four sets of ends to the center of the challah. Pinch those together. Yes, really!
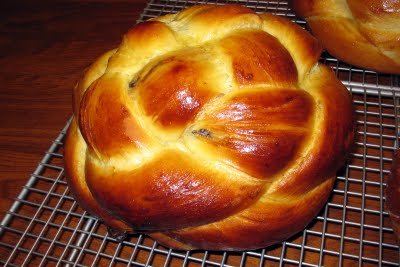
Step 8: And now for the magic, flip your whole loaf over and ta da! A perfectly braided round loaf!
Let the loaves rise, but watch them so they don't over rise and ruin your beautiful work! Brush with egg white and sprinkle with sesame seeds and bake.
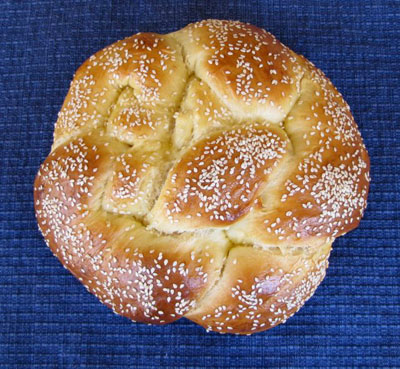
2-Strand Rosette Shape
The rosette is composed of two strands of dough. The longer and more cylindrical the strands of dough are, the more satisfying to behold the final rosette will be. To shape the strands, cut the dough in half, shape rounds, and leave them to relax on a lightly floured surface for 30 minutes.
Shape the two pieces of dough into long round lengths about 30" each. Cross one strand over the other, in the shape of an 'X'.
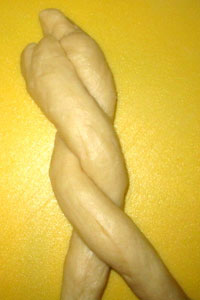
Then cross the bottom strand over the top strand - pick up the 2 ends of the bottom piece of dough, cross them over the top dough piece, and place them back on the work surface. Repeat this until you have used up the lengths of dough. The resulting shape is a twist.
Pick up one strand and drape it across the other strand. Drape rather loosely so that the strands won’t be too tight and burst during baking. Alternating strands, drape one over the other as the twist gets longer.
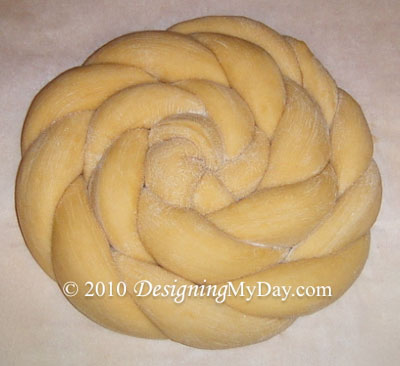
Beginning at one end and keeping the dough flat on the surface of the counter, begin to coil up the twist to form the rosette. Start at the center and continue to wind up the dough around the outside. What to do with the loose end of the twist? Simply tuck it under the rosette.
Resist the temptation to roll the rosette tightly. While this looks beautiful in dough, it won't make for good bread. The challah needs to expand when it bakes. A tight rosette will inhibit this expansion, and the challah may not cook all the way through. The most evenly baked challah rosettes are loosely twisted, loosely rolled, and lie as flat to the working surface as possible. Ready to go in the oven, the rosette's profile should be more akin to a flying saucer than a mountain.
Linked Loops Round
The chain shape represents unity, strength, and togetherness. While the pattern looks intricate, it's actually quite simple to make.
Divide the dough into five thick equal-size strands. Don't taper the strands as you would for a normal challah braid. Form one strand into a circle, pinching the ends together to create a ring of dough.
Take another strand and connect it to the first circle as in a chain. Pinch the ends together to form a second circle.
Repeat the process until all the strands form a complete chain. The final circle links to the first one to create a round challah shape.
Brush with egg wash, top if desired, and allow challah to rise.
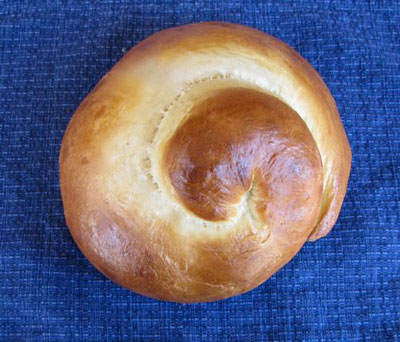
Turban Shaped Challah
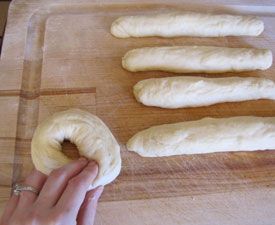
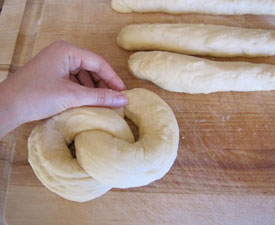
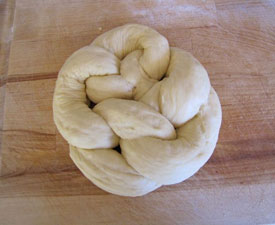
Roll the dough using both hands to smooth seams and create one large strand.
Taper the strand at the ends by rolling the dough between your palms, then roll one end of the strand inward to create a spiral snail-shell shape.
Continue rolling the strand in the same direction until the spiral is complete. Tuck the loose end of the spiral underneath the challah and pinch it tightly into the bottom, securing it. Apply egg wash; let rise.
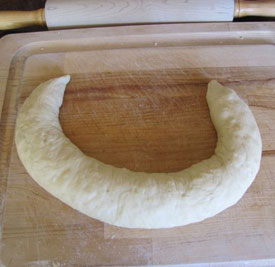
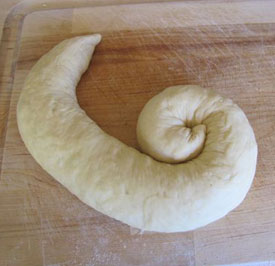
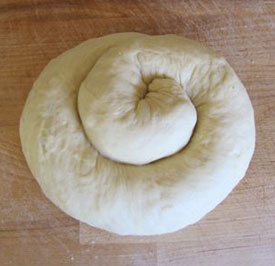
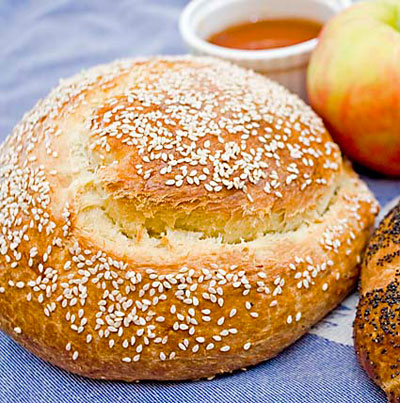
Another Turban Shape
A turban-shaped loaf, ready for eating with apples and honey for a sweet New Year.
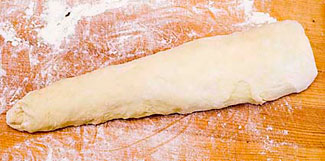
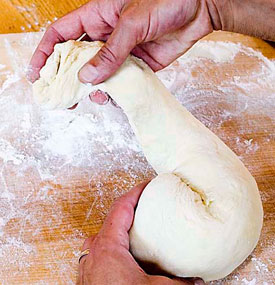
Start with a grapefruit-sized piece of dough. Thin out one end by rolling and stretching at the end that's going to be thinned.
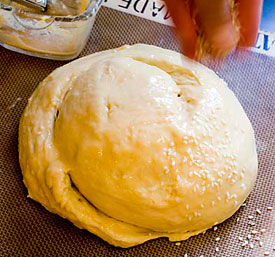
Starting with thick end in the middle, wind the thinner end around it and finally, tuck it underneath to seal:
Put the loaf on a cookie sheet prepared with shortening or parchment paper, let rise.
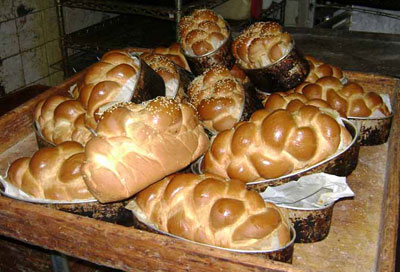
Section Challah
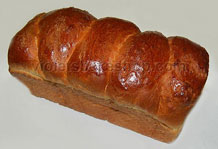
Section Challah, also called Pan Loaf Challah, is baked in tins. See the picture to the left. Here 6-Strand Braids have been placed into oval oven baking tins.
Another traditional section challah shape is made in regular bread tins.
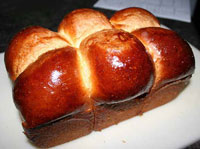
Divide the dough into 6 equal pieces. Roll each piece into a ball. Using the palm of your hands, gently roll the balls into small oblongs not more than the width of your hand. Place all six oblongs in a well-greased 8 or 9 inch loaf pan (See loaf on left below).
Beat one egg and using a pastry brush, carefully brush each oblong with egg wash. Cover with cloth and proof until Challah has doubled in size.
Alternatively make balls of dough and place in pan as shown in the picture on the right below.