5 Tips to Create Incredible Dough Strength
from https://www.youtube.com/watch?v=wHL44ONu3so, video from The Bread Code
He is working with an 80% hydration dough here.
You need to start with a strong starter and one that is not too sour. A too sour dough attacks the gluten in the flour. Also the amount of protein of your bread flour will determine the hydration you can achieve in your dough. The video goes through the steps in building a dough and how the dough should look and behave at each step. If it doesn't the problem could be too much water or the bread dough is too sour. In another video he seems to say this is especially useful with a high hydration dough or one that has not had the proper amount of water added so it is too soft and doesn't hold together.
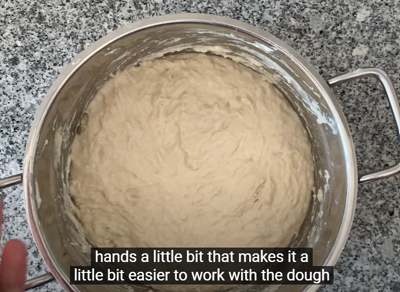
1. Autolyse: Autolyse is a technique for improving gluten development without heavy kneading. Flour and water only are mixed and as it sits will start to develop gluten strength. His dough is 80% hydration. He suggests mixing with your hands until all the flour has gotten wet and has come to a mass in the middle of the bowl. He pulls some of the dough up from the edge of the bowl and flops it over to mix it. He then turns the bowl and continues doing the same around the bowl over and over. The dough will be sticky and ragged. Once mixed, if he pulls some of the dough up, it tears; it has not developed any gluten strength yet. This will sit at room temperature for 30 minutes.
I made a loaf that was a bit gummy. My Autolyse was longer than 2 hours, time given in the recipe, while waiting for my levain.
I read this about Autolyse: "The problem is that when you soak flour, it starts the enzyme activity. We like this because it releases the sugars and adds to flavor. However, if this is not controlled, then the enzymes can be break down the flour too much and lead to a gummy dough. One way to control the enzyme activity to a degree is to add salt. So if you want to go the length of time you are talking about (3 - 4 hours) without refrigeration, then you should use a soaker of flour, liquid, and salt (no yeast). I don't know how many hours you can do an autolyse with no salt at room temperature before you run into these issues. Too long and refrigeration is needed. For what it's worth, I highly recommend at least an over night soak when using whole grains." Someone else added: "The strength of the flour also has a great affect on the autolyse. AP will break down faster than Bread Flour. And large amount of spelt, don’t even consider autolyse. Flours that are naturally extensible don’t (and probably shouldn’t) be autolysed."
This from another forum: "Salt also impedes the releasing of the gelatinous starch which forms the walls of the bubbles in the crumb. Alton Brown, in his somewhat wacky "Good Eats" show explained the competition for water molecules between salt and pentosans in oats. Pentosans form the starchy gel in a dough when mixed with water. Same applies in wheat or any cereal. When adding salt to a cereal, it is always best to do so after the water has been added so the pentosans (gelatinous starches) can absorb the water without the competition of the salt molecules. That is why tangzhong yields a nice soft loaf. It adds gelatinous starch."
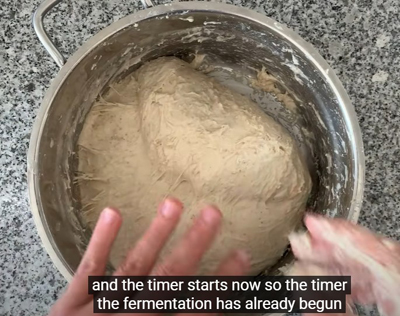
2. Mix Dough: Add salt and sourdough starter. After 30 minutes, if you pull up some of the dough, it no longer tears but stretches instead and sticks less to your hand. Gluten is already forming by just letting the flour and water mixture sit. Add the salt (2%) and strong sourdough starter (20%). You can taste your sourdough starter to make sure it is not too sour. Smear the starter around and start kneading to mix in. He continues to use his hand when handling the dough because you can feel better how the dough is behaving. He does this by pulling the dough up from the side of the bowl and folding it over the top until well incorporated. The dough should hold together and show signs of gluten development. If you pull the dough up, it will stretch and hold together, although at some point it will break.
Bulk Fermentation starts as soon as the starter is added.
After 15 minutes he will do bench kneading.
3. Bench kneading: Use your countertop and do not use any flour so the dough can stick to the surface. Wet your hands a bit and lift the dough from the side of the bowl and fold over. Go around the bowl to loosen the dough, then lift the dough out of the bowl and place it on the counter. The dough should be even less sticky at this point, although it will flatten out as it has not gained all the strength yet. Lightly wet hands and a bench scraper if you have it, Pull the dough up from one side and fold it over the top of the dough. Do the same from the opposite side. The dough should hold it shape after just his one fold. Wet your scraper and hand again if necessary and repeat the folds on the other two sides. It should form a nice bundle. Repeat for maybe 5 minutes until the dough is feeling like it is holding together even better. His dough looks like a roll of dough and is not flat.
Then round the dough up to add additional strength. Again with no flour on the counter, with the dough scraper at 45 degree angle against the counter (or use the bottom of your palm), rotate the dough up from the bottom right side and around to the top and push, tucking it under the top. Use the left hand to hold the other side of the dough. You may need to wet your scraper and hand. Put the dough in the bowl and let the gluten relax for 15 minutes.
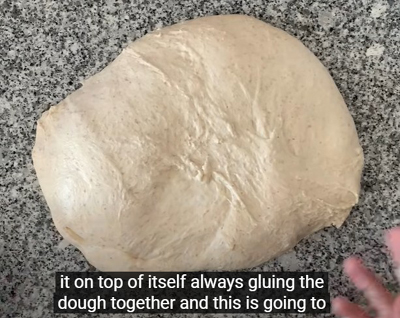
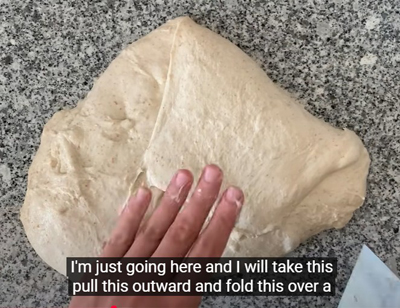
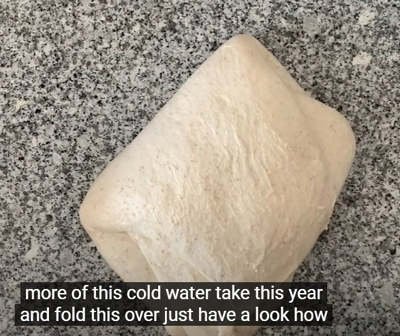
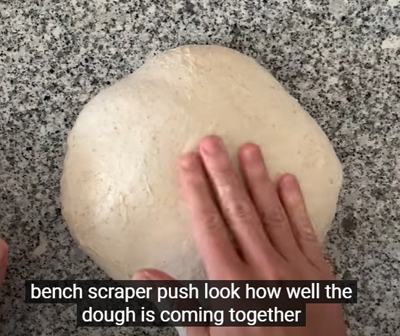
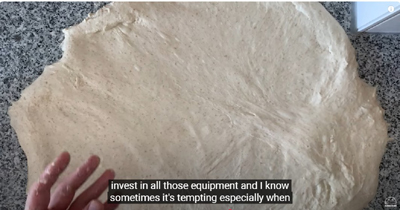
4. Lamination: Lamination is especially beneficial for high-hydration sourdoughs, which can be prone to being sticky and difficult to work with. The process helps strengthen the dough, making it easier to handle and shape. Lamination can be used to evenly distribute inclusions like seeds, nuts, or dried fruit within the dough. By stretching and folding, the add-ins are dispersed throughout the dough, resulting in a more consistent and pleasing final product.
Go around the dough in the bowl, folding it over, again to loosen it from the bowl. The dough should stick less. Place dough on counter, lift from the edge and stretch it out on the counter. It should not tear. Fold the top edge of the dough to the center. Fold the bottom edge of the dough over to the top edge of the dough. Fold the right edge of the dough to the center, then the left side to the center. Fold the right side over to the left edge.
Round the dough as above. He divides his dough before rounding if making more than one loaf because it avoids ruining the structure later. Once the dough in the glass jar doubles, he does the coil foil.
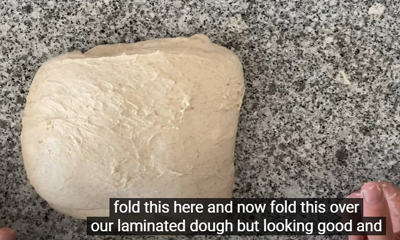
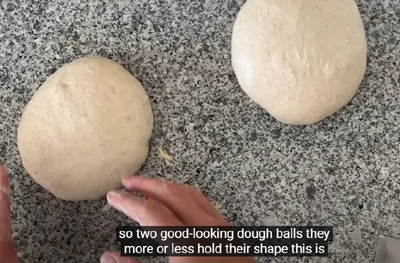
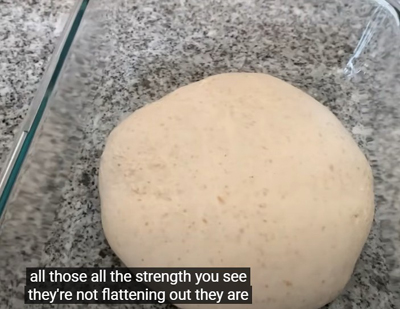
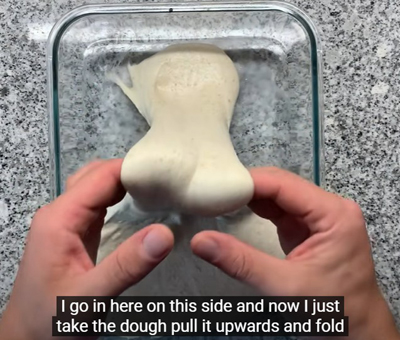
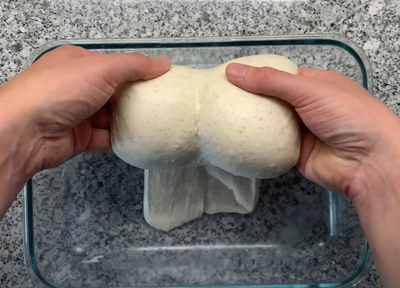
5. Coil Folding: Dough should no longer be flattening out. To do a coil fold, pull the dough up a bit down from the top side and let the top of dough fold under the dough. You may to do this a couple of times if the dough does not release immediately. Do the same from the other side. The dough should not be sticking to your hands. Do the same thing from the other sides, lifting and rolling the dough under. You should see some good bubbles in the dough, a good sign of fermentation. For the 4th coil from the remaining side, lift and roll it under itself so the dough creates a coil. Do this a few more times. A good recommendation is to observe your dough in your bulk container. Once you see that the dough flattens out quite a lot and spreads towards the edges of your bulk container, you can proceed and apply a another coil fold. Lots of bubbles forming.
Once the dough looks like it has strengthen enough, place it in a bowl to finish bulk ferment. You can put a small piece of dough and add it to a glass jar with strait sides to see when it has doubled in size. Use a rubber ban to mark the height of the dough when you first place it in a jar. When it doubles in size, bulk ferment should be finished and will be ready for shaping. He figures this will take 6 hours. Make sure to keep the dough and aliquot jar close together. This makes sure that both are in the same environment temperature.
Do one last coil foil, wait a few minutes and shape. Do a light preshape to form into a round ball if need be. Again rest a few minutes to let the gluten relax and shape. Proofing should take about a hour.
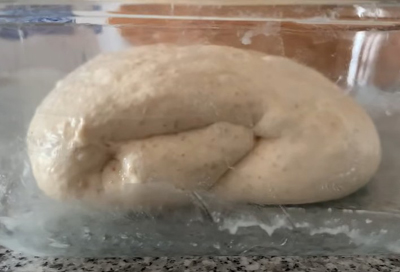
Fermentation Overview
Fermentation is the most important step in making a great sourdough bread.
1. Start with a very strong starter. Your starter should be doubling in about 5 hours.
2. Bulk Fermentation: Bulk fermentation starts the moment you add your starter to the dough. You want to get maximum expansion from the yeast. Problem is that the acid created by the bacteria attacks the gluten structure. At some point, the gluten will no longer hold together. If your dough no longer holds its shape, flows out flat and sticks to the bowl, it has been overproofed. With bulk ferment you have to find the sweet spot where it has fermented enough, but not too much.
A Trick is to take a small piece of dough after you mix in your starter and place in a jar with a rubber band to indicate its height. When it has doubled in bulk, chances are bulk fermentation is done.
3. Proper Proofing: You further proof sourdough after bulk fermentation, also known as final proofing or bench proofing, because shaping the dough disrupts the gas structure and requires a period of rest for the dough to regain volume and develop a good crumb structure before baking. Once the dough has been shaped into boules (rounds) or bâtards (ovals), they need to go through proofing to increase their aeration, Use the Poke test. After it passes this test he puts the dough in the frig for 8 hours. He says the cold air in the dough helps it to expand during baking.
