Drying and Storing Your Starter
Drying your starter is a great way to store it long term if you don’t plan to bake for a while, or if you want to have a back up of it after all of your efforts.
- First, feed your starter as though you were going to bake with it. If it's been stored in the fridge, take it out, and feed it with equal parts unbleached all-purpose flour and lukewarm water. Let it rest, covered, until it becomes very bubbly and healthy looking.
- Spread it out to dry. Spread it – all of it – onto two pieces of parchment. It helps to set each piece of parchment on a baking sheet, simply for ease of transportation. The starter should be spread as thinly as possible; use a spatula, an offset spatula, or a bowl scraper to help the process along.
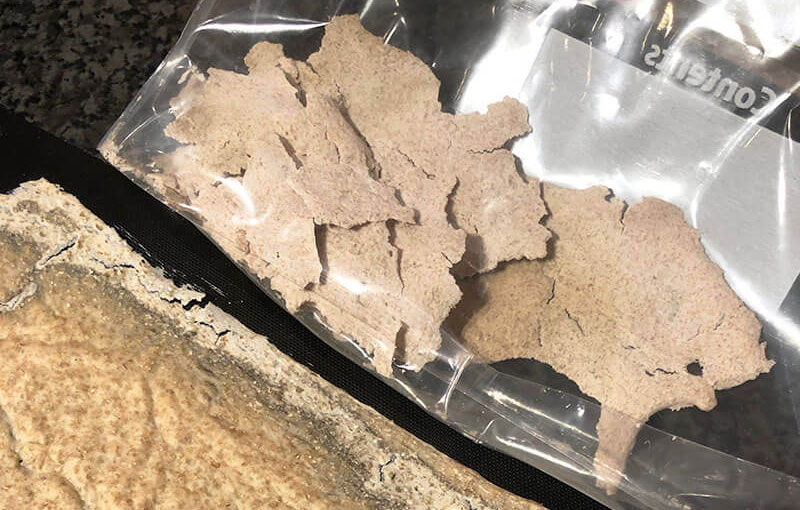
- Dry the starter completely, until it's brittle. Let the starter dry at room temperature until it's completely and utterly dry. This will take a day (if you live, say, in Arizona, in a house without air conditioning); or up to three, four, five days – it totally depends on the weather. In Seattle, in winter? Count on a long dry. It will lighten in colour and start to lift up.
- When dry, break up into smaller bits and store in an airtight container. You want something totally inert, with an airtight cover; a glass jar is perfect. Date the jar and label it.
- Keep the jar of dried starter in a cool, dark place, if possible. Not cool as in refrigerator but in a cubboard that does not get heat from the stove or oven.
- To rehydrate, weigh the dry starter and add the same weight in water, or a little more if necessary to cover it. Stir the chips/water occasionally. It usually takes about 24 hours to fully rehydrate.
- Once the mixture is fairly smooth/liquid, with perhaps just a couple of small undissolved chips, feed it with equal amounts of water and flour. Cover it lightly (a shower cap works well here), and place it somewhere warm.
- Let the starter work for 24 hours. At the end of that time, you should see some bubbles starting to form. Remember, this is at about 85°F; if your temperature is lower, this will take longer.
- Feed the starter again. WITHOUT DISCARDING ANY OF THE STARTER, feed it with 1 ounce of lukewarm water, and 1 ounce of flour. Cover, and put back in its warm spot. After "X" hours (depends on your kitchen), you should see some serious bubbling; mine took eight hours to become nice and bubbly.
- And again. Feed the starter again – 1 ounce of lukewarm water, 1 ounce of flour – cover, and wait. Again, you're not discarding any at this point. About 12 hours later, it will exhibit a host of tiny bubbles, and has expanded. You may also notice, from the side of the container, that it's risen, and then fallen; this is completely natural.
- Put the starter back on its regular feeding schedule.
