Soft 'n Chewy Hoagie Rolls
Author: The Kitchen Whisperer, http://www.thekitchenwhisperer.net/
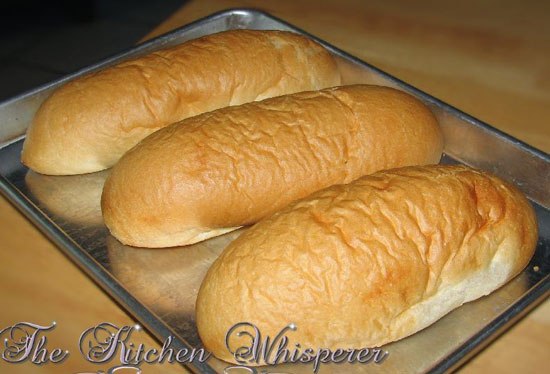
FMM: These rolls look like they would be great for making Cheesesteaks. For hoagies, I would prefer a roll that is crisp and crunchy on the outside, like French bread.
4 cups bread flour
1 3/8 cups warm water (110-115F degrees) *See note
2 Tbl sugar
1 Tbl active dry yeast
1 tsp salt
3 Tbl cold butter, cubed
Add the yeast, sugar and 3/8 cup warm water in a bowl of a stand mixer. Using a whisk or spoon, mix and set aside for 5-10 minutes or until the yeast has bubbled quite a bit.
In the bowl of a stand mixer fitted with the dough hook (this would be the same bowl your yeast mixture is in) add in the flour and water. Start off on low. Mix for 4 minutes.
Add in the salt and mix for 5-6 minutes until the dough is slack (See note). At this point your mixer should be at medium speed.
Add in the butter and mix for 1-3 minutes or until the dough comes back together.
Remove from bowl and transfer to a greased, covered bowl until doubled in size. ~1 hour.
Divide into 8 pieces and shape. I would advise using as little flour as possible when shaping these. The more flour you add, the tougher the hoagies will be.
Transfer to a sprayed, parchment lined tray and cover. Allow to rise again. ~30-45 minutes.
Preheat oven to 375 and bake for 16-23 minutes or until golden brown.
Allow to cool before cutting with a quality bread knife
Note: Slack dough means when then dough cannot hold a shape; it has no elasticity or spring back at all. It’s wet dough but not too wet. It’s “billowy”. The dough is super, super soft and smooth.
8 rolls
Philly Cheesesteak Rolls
from https://www.rockrecipes.com/
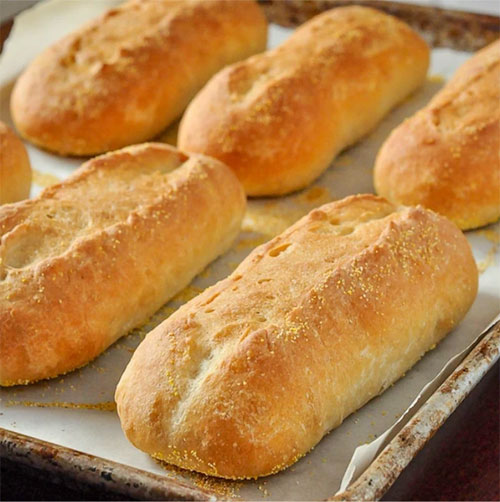
"The rolls for Philly cheesesteaks almost always come from Amoroso’s Bakery. For me, the rolls are what make the sandwiches in Philadelphia great. They are simply perfect for the job at hand – lightly crispy outside with a soft, airy, slightly chewy inside. They are sturdy enough to hold up to the robust filling, while being light enough that you don’t feel like you’ve eaten a pound of bread.
"– Be careful not to add a lot of flour in the kneading process. You still want this to be a little bit of a sticky dough right through to the end stages. This ensures that the final inside texture of the roll is soft, with the gluten well developed, and not a denser texture with tight bubbles.
"– Knead the dough by hand for 5 minutes, even after it comes out of the stand mixer, remembering to use as little flour as possible. Use the heel of your hand to stretch the dough across the kneading surface in a sort of smearing action. Then fold the dough back over itself, turn it around and do the same again. Keep repeating this action for at least five minutes to develop good gluten in the dough.
"– Never add the olive oil with the rest of the ingredients; this will inhibit production of gluten and form a less elastic dough. Add the oil only after the gluten strands have already begun to form within the dough."
1 envelope active dry yeast, 7-8 grams or about 2 tsp, not instant yeast
4 tsp sugar
3 cups all purpose flour + a little more for kneading
1 1/2 tsp salt
1 1/3 cups water, lukewarm
2 tbsp olive oil, plus a little more to brush on the rolls
In a small bowl or measuring cup, dissolve 1 tsp sugar in 1/3 cup of the lukewarm water. Sprinkle the yeast over the water and let stand for 10-15 minutes until the yeast activates and becomes foamy.
Meanwhile combine the flour, 3 tsp sugar and salt in the bowl of a stand mixer with the dough hook attached.
Add the proofed yeast and the remaining 1 cup lukewarm water.
Mix on low speed until the dough has been kneaded for at least 5 minutes before adding the olive oil and letting it work its way into the dough.
Turn the dough out onto a very lightly floured bread board or counter top. Knead the dough by hand for at least 5 minutes after it comes out of the stand mixer, remembering to use as little flour as possible.
Use the heel of your hand to stretch the dough across the kneading surface in a sort of smearing action, then fold the dough back over itself, turn it around a half turn and and do the same again. Keep repeating this action for at least five to ten minutes to develop good gluten in the dough. The dough should appear relatively smooth but still a little sticky to the touch.
Lightly oil a large bowl with olive oil, place the dough inside, cover it with plastic wrap and let it sit in a warm place for at least an hour until the dough doubles in size.
Forming the rolls:
Again on a lightly floured surface, knead the dough back into a ball and cut into 6 equal pieces.
Form the dough pieces into about 5 inch lengths and place them a couple of inches apart on a parchment paper lined cookie sheet.
You can dust the parchment with yellow cornmeal if you like but it shouldn't stick to the parchment paper in any case.
Very lightly brush the formed rolls with olive oil. Dust the tops with a little cornmeal too if you like.
Drape the cookie sheet loosely with plastic wrap and let the rolls rise in a warm place for at least another hour until they at least double in size. You con't want to rush the dough rising at this stage or else your rolls will be too dense.
Preheat the oven to 425 degrees F. The oven MUST be fully preheated. Place a small tray of boiling water in the back corner of the oven. I use an aluminum pie plate. This causes humidity inside the oven, which helps the bread fully rise before forming a crust.
Using a very sharp knife or razor blade, quickly but gently cut a 1/4 inch deep slit down the centre line of the rolls before immediately popping the tray into the hot oven.
Bake for 10 minutes before reducing the heat to 400 degrees F and baking for an additional 20-25 minutes until the rolls are an even golden brown. They should sound hollow when tapped with your finger.
Let them cool on a wire rack before serving as fresh as possible with the cooked steak and cheese inside.
