Stretch and Fold Technique
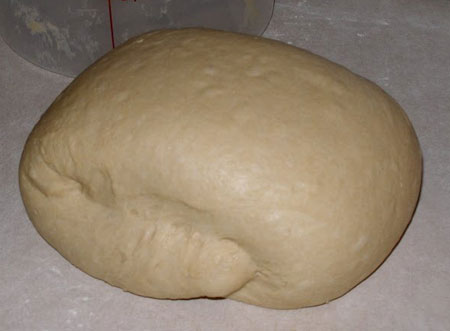
Dough ready for its final fold.
This is a method of handling dough which pretty much replaces, in whole or in part, the more traditional ”push and turn” method of kneading of the dough. It means to intermittently fold the dough over onto itself during the fermentation stage. What this accomplishes is to strengthen the bonding of the gluten protein threads that hold the dough together and thus trap the carbon dioxide created by the yeast. This is what creates the bubbles or air pockets that we refer to as the "crumb" in the final bread. It allows us to more fully hydrate the dough, almost to the point of over-stickiness, yet still create a very workable, dynamic dough, one that pops in the oven and creates more of the large irregular holes that artisan bakers (and consumers) love to see.
Folding helps strengthen the gluten network, allowing the short chains of gluten to link up into longer strands, resulting in a dough that’s more extensible and therefore better able to trap the gases expelled by yeast. During the kneading or folding process, the dough transforms from a shaggy mass into a smooth, elastic dough.
When do we apply the folds? Because the structure of the gluten network needs to be in place to prevent the gas from escaping, most of the folds should be applied in the early stages of bulk fermentation. Gas buildup in the dough also contributes to its strength, as the gas expands and stretches the web within the gluten network. Folding allows the dough to capture as much of the gas as possilbe. That said, it is not unreasonable to give a very slack dough one last fold an hour prior to dividing and shaping. I recommend applying the first fold 10 minutes or so after the final mix is done. Each successive fold can occur anytime after the dough has completely relaxed from the previous fold. The dough will go from being a ball with structure to lying flattened out in the tub. After completing the folds, turn the dough over so the side where the folds come together is facing down. This helps the folds hold their position. The top should be smooth.
How many folds does the dough need? This depends on how wet and slack it was when mixed. Wet doughs get very little gluten develpment during the hand mixing, so they need three or four folds during the first hour or two of fermentation to give the gluen network enough structure to create a light crumb texture in the bread.
When working with your dough, you will be able to see the physical change after you have folded it. If, based on what you observe, you want to give it one more fold, go ahead and do it.
Although, as with most anything, there are variations on how it’s done, the basic principle is as follows:
Stretch and Fold
Take your dough that has been resting and turn it out on the counter (some recipes have you do the stretches and folds in the bowl). The counter should be either very, very lightly floured for the first fold of regular dough, or slightly dampened for first fold of wet dough and unfloured for 2nd and later folds of either.
Gently stretch the ball of dough into a large squarish shape. You are not aiming to remove all the air bubbles, just redistribute the dough to encourage gluten development.
Stretch it to about 1/3 the thickness of the original ball so if you plopped the dough on the surface and it was 3" tall you stretch it to a square about 1" thick, using your scraper to help loosen the dough from the counter and pull it out from the centre. Once it’s square-ish, grab the top edge, pulling this section up to give it a bit of a stretch, then fold it down over itself to about 1/3, much as you’d fold a piece of paper in three. Next, grab the bottom section, give a stretch and fold up over itself so you’ve just folded your square into three, like you would fold a sheet of paper.
Now take the left side and fold over to the right, then finally the right side over to the left and you’ve got a stack of several folds (nine, in fact) and given a stretch each time you folded. Voila, you’ve "stretched and folded"! You’re done. Return to the raising bowl until your next fold.
This is done around three times: once after the dough has risen the first time, then twice more after subsequent raises. The goal is to trap as much air as possible between ‘layers’ of dough to produce a flavorful and porous crumb. If you fold properly, the dough will continue to feel light and airy as you work it. If it starts to feel heavy, that's a sign that you may be working it too much.
Folding that ceases earlier in the bulk ferment will leave more gas pockets in the dough. Folds that continue longer into the bulk ferment will produce a more uniform crumb.
French Fold
A technique that is SIMILAR to Stretch and Fold is called the French Fold. The basic difference is that this method uses a dough’s stickiness to help with the stretching. This is typically done on the first stretch of a rather wet dough, subsequent stretches are more likely less wet and can be done with the plain Stretch and Fold above.
When the primary fermentation is complete turn the dough out on a lightly wet board or counter (so the dough doesn't stick), wet your hands also if the dough is sticky, then lift and flip/roll the dough over and onto itself like a jelly roll. The dough will then be shaped like a cigar. The baker then rolls up the dough along the other axis, forming the dough into a ball, then putting it back in the bowl. Return dough to the bowl for another rise.
This is done 3 or 4 times before shaping.
The Coil Fold Method
A coil fold is a type of strengthening action used to help develop gluten in the dough during the bulk fermentation stage. It’s similar to a stretch and fold in that it should be performed on the dough without removing it from its proofing container. It’s a simple method of folding dough that relies on surface tension and gravity.
Coil folding is an excellent method to choose if you are working with dough that has a higher hydration, or needs a little extra help with developing gluten strength. Due to the symmetrical method of performing the folds, using coil folds also helps to ensure an even fermentation rate, and uniform crumb structure. It’s a relatively gentle way to handle your dough while also helping it develop the strength it needs for the oven, and the risk for inadvertently degassing or over-handling is low when using a coil fold.
With wet hands, gently loosen the dough from its proofing container by lifting it from the center. As you lift the dough from the center, the ends should stretch from their weight. Free one end first, and fold the middle of the dough over the end. Repeat on the other end: Lift the dough again from the center, making sure to grab the just folded end. Fold the middle of the dough over the other end. You just completed one side. Rotate the proofing container and repeat on the other side. If you are unsure what side you are working on, take a look at the ends, they should look coiled. We want to fold these ends under. Continue performing this folding action until the dough feels like it won’t stretch and elongate easily, usually four to five times initially.
Repeat this process at intervals until your dough has built enough strength that it easily holds its shape during the coil fold process, and feels aerated and smooth.
