Traditional Sourdough Panettone
Overview
- Traditional Panettone is made using a sweet stiff sourdough starter. A stiff starter/levain is less hydrated than your normal liquid starter. This is relatively easy to build and gives less sour taste and fast action when it comes to fermentation. If you need to make a stiff starter, it is a good idea to start with good active liquid starter and then build a strong stiff starter from there. This may take 3-4 feedings. When your stiff starter doubles in about 5 hours at 80°F (26°C) then it is ready to be used in the panettone.
- If you maintain your starter at 100% hydration, you can create a 50% hydration starter for this recipe by taking 60g of 100% hydration starter, mixing with 30g water and then adding 90g bread flour. After mixing the ingredients together to form a shaggy dough, turn them out onto a clean working surface and knead until smooth and homogenous. Cover and let rise in a warm spot (~80F) until tripled. This could be 4-5 hours or longer.
For each subsequent refreshment, take 60g of 50% hydration starter, mix in 30g of water, add 60g of bread flour and mix as before. If the starter triples in volume at a warm room temp (~80F) in 4 hours, it’s ready for making panettone. If not, refresh the starter more often, say 2-3 times per day for several days (or weeks) until it’s active enough to triple in volume in 4 hours. The recipe calls for 60g of stiff sourdough starter.
- If you maintain your starter at 100% hydration, you can create a 50% hydration starter for this recipe by taking 60g of 100% hydration starter, mixing with 30g water and then adding 90g bread flour. After mixing the ingredients together to form a shaggy dough, turn them out onto a clean working surface and knead until smooth and homogenous. Cover and let rise in a warm spot (~80F) until tripled. This could be 4-5 hours or longer.
- This recipe works best with high gluten flour or normal bread flour modified with added vital wheat gluten. 00 Pizza flour has a very fine granule and high gluten percentage. This helps speed up gluten formation. If you can’t find pizza flour, that’s fine, just bread flour only. You can use bread flour to refresh the starter, but an even higher gluten flour in the actual dough gives the best results for a high-rising, delicate crumb structure.
The author of the recipe below recommends using a flour with a gluten level of 14.2%. If this is not available, you can create your own high gluten flour by adding vital wheat gluten to bread flour. He has a calculator that will tell you how much vital wheat gluten and bread flour you need to get the proper level. Gluten Enrichment Calculator. - You can make your own Orange peel, which needs to be done several days in advance.
- The bread is made with what is called a First Dough and a Second Dough. This is quite consistent between recipes:
- First Dough: First place flour, sugar and water in the bowl of the stand mixer. Mix with a paddle attachment. Then change to dough hook and add egg yolks a little at a time and mix to incorporate. The stiff levain into broken into chunks and add to the dough and kneaded until incorporated. Soft butter is added a little at a time and mix until cleared. Once everything is added, the dough is kneaded until you get a smooth silky dough. This may take about 8-15 minutes. The dough should pass a ‘window pane’ test. It is then set aside to ferment and should roughly triple it’s volume, whih can take 10-12 hours at around 70°F.
- Second Dough: Start by placing the first dough, flour and honey in the mixing bowl. Mix using the dough hook until incorporated and a dough is developed. Add 1/3 of the egg yolks and half the sugar, mix on medium until they disappear. Now repeat with another 1/3 of the eggs, the rest of the sugar, and mix until incorporated. Then start adding butter a few pieces at a time and mix on low speed. Take your time doing this, make sure butter is fully incorporated. After all the butter is in, add the rest of the egg yolks and start mixing using the paddle attachment. Check the dough temperature from time to time. If it is rising above 24°C (75°F), stop mixing and place the bowl in the fridge for 5 minutes. After about 15-20 minutes of mixing, you will get a relatively stronger dough. It will start pull from the sides. Keep kneading until you get a shiny, elastic dough with a very elastic stretchy texture. Then it is time to add the fruit.
- Panettone molds with skewers: Once the dough is rested, using a metal bench scraper, mold/shape the dough into a boule. This will help create tension on the outer skin. Let these rest for another 15 minutes, repeat the process, and place in the pannetone molds with skewers inserted, which will be used to hang them to cool once baked. Leave them covered in a slightly warm place until the dough is proofed and reaches the top of the mold.
- When the panettone is done baking, remove them carefully from the oven and immediately tip them upside down and hang using the skewers until completely cooled. Always leave them to cool overnight (minimum 6 hours) before cutting into them. Cover with plastic to stop them from drying out.
Naturally Leaven Christmas Panettone
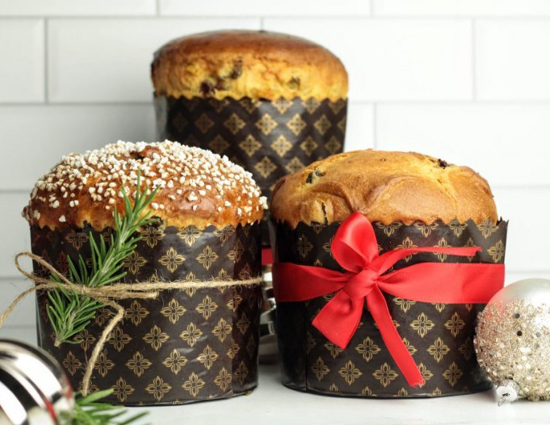 from https://breadtopia.com/
Breadtopia community member Dan Dee adapted this recipe from one by the Italian master pastry chef, Iginio Massari, as described on the Italian cooking blogs Fables de Sucre and Inventaricette. He tried many Panettone recipes over the years in his quest to make a panettone better than the ones you can buy, but he never found a recipe that would yield the soft, silky crumb that he was looking for, until he discovered some Italian recipes that were leavened solely with a specially managed sourdough starter. The results were pretty amazing! Many of the notes above also come from this post, for instance, how to make a stiff sourdough starter and how to make your own high gluten flour from bread flour.
First Dough: Hydration, Mixing and Dough Temperature
Hydration & Mixing
The first dough is very stiff before you start adding the butter and egg yolks. If you feel it is too stiff for your mixer, try increasing the water in the first dough and decreasing the water in the second dough by the same amount. Note that after incorporating the softened butter followed by the egg yolks, the dough softens nicely, despite its initial stiffness. However, it takes quite a while to incorporate the fats at the beginning.
Dough Temperature
Because incorporating ingredients into both the initial and final doughs does take a long time, you need to pay attention to the dough temperature to make sure it stays in the “target zone” i.e., the dough doesn’t overheat. Check the dough temperature periodically and if it reaches 79F (26 °C), stop mixing and place the mixing bowl, dough and dough hook into the freezer for about 10 minutes to cool them back down, then resume mixing.
Second Dough: Shaping – La Pirlatura
Italian bakers call the technique of shaping the second dough la pirlatura. There are a couple videos (in Italian) demonstrating the process; the first is Adriano Continisio and the second is Loredana Mesiano.
Timing and Fermentation
As with any other sourdough bread, the rise times will depend on the strength of your starter and the proofing temperature, etc. Your proofing times may not correspond to the timeline I have provided, especially if you do not use a temperature controlled proofing box. Try to let the dough tell you when it is ready. For the first dough, it is when it has tripled in volume.
For the final proof, it is when the dough has risen to about 1/2 inch below the top of the paper mold at the edges. Just be patient!
Skewering the Molds
Panettone dough rises quite a bit during the final proof and is enriched with a lot of fats, which leads to a very light and delicate crumb. As such, panettone needs to cool in an inverted position or else it will collapse under its own weight until the starches and fats “set up.” Some insert the skewers when the panettone comes out of the oven. The Wild Yeast Blog suggests inserting the skewers before you place the dough into the molds, and I think this works really well. If your molds + skewers will not fit fully within your baking pan, just make sure you insert the skewers high enough (but not too high!) so that they will clear the sides of the pan without warping the molds or you may get a wonky-shaped panettone.
This recipe makes a little over 1.1kg of dough
2 5.25 inch diameter paper panettone molds
1-2 2.75 inch diameter paper panettone molds, as needed for extra dough
4-8 Skewers, around 12” long (I use wooden ones, two per mold)
Toppings
The top of a traditional panettone is scored with a cross and topped with a pat of softened butter placed in the center of the cross just before baking. Fancier versions include other types of toppings. I suggest that for the first time or two, just make a panettone with the scored cross.
Ingredients
Sourdough Starter Refresh your active, 50% hydration sourdough starter as follows:
60g starter (50% hydration, tripling in 4 hours)
60g bread flour
30g water
First Dough
240g high gluten flour - or - bread flour with added vital wheat gluten
75g granulated sugar
105g water at room temperature
85g unsalted butter, softened
85g of egg yolks (about 5 large eggs), divided
60g active 50% hydration sourdough starter, 4 hours from refreshment (see instructions)
Second Dough
All of the First Dough
60g high gluten flour - or - bread flour with added vital wheat gluten
All of the Aromatic Mix (see below)
60g granulated sugar
80g egg yolks (about 5 large eggs), divided
5g table salt
90g unsalted butter, softened
10g water at room temperature
All of Dried Fruit Inclusions (see below)
Aromatic Mix
20g honey
1 Tbsp vanilla extract
Zest of 1 orange (blemish free)
Zest of 1 lemon (blemish free)
(Reduce zest of ½ of each fruit if you are using candied citrus.)
Dried Fruit Inclusions (240g total)
80g raisins, soaked in 120 ml (4 ounces) water - or - 60 ml (2 ounces) water + 60 ml (2 ounces) rum or the spirit of your choice
80g golden raisins, soaked in 120 ml (4 ounces) water - or -60 ml (2 ounces) water + 60 ml (2 ounces) rum or the spirit of your choice
80g dried cranberries, soaked in 120 ml (4 ounces) water - or - 60 ml (2 ounces) water + 60 ml (2 ounces) brandy or the spirit of your choice
Dried Fruit and Candied Peel Alternative
120g raisins (soak in 5 ounces of 50:50 water and the spirit of your choice, or water only)
90g candied orange peel in small pieces
30g candied lemon peel in small pieces
Instructions
This recipe will take two days plus any sourdough starter preparation time and will make two 500g panettones with a little dough left over (that can make one or more mini versions). The times listed here are the ones I use/observe. Your times may vary due to differences in starter strength and proofing environment.
DAY 1 at 8:00 AM
Refresh the sourdough starter
Mix (by hand or with stand mixer) 60g of an active 50% hydration sourdough starter with 30g purified water until the starter is softened and absorbs most of the water (about 3 minutes). Add 60g of bread flour to the previous mix and stir to combine. Once the mixture comes together into a rough dough ball, turn out onto a clean surface and knead until it forms into a smooth, homogenous ball, around 10 minutes. Place refreshed starter into a container with straight sides, mark the original dough level and place in a warm spot to rise, preferably between 83F and 85F.
DAY 1 at 10:00 AM
Prepare the aromatic mix
Wash the orange and lemon with a vegetable/fruit cleaner, rinse and dry. Remove the zest with a microplane or similar zesting tool, taking care to remove only the outer skin, not the white pith. Mix the zest with the honey and vanilla extract in a bowl. Let it sit out, covered, at room temperature for around 24 hours.
DAY 1 at 12:00 PM and 4:00 PM
Refresh the sourdough starter again
The starter should have tripled in volume since the last refreshment. Refresh using the same method as in the previous refreshment. Discard any unused starter from the last refreshment or save it to make bread, waffles, scones, etc.
DAY 1 at 4:30 PM
Prepare the dried fruit
Measure out the raisins, golden raisins and dried cranberries, each in a separate container with a tight fitting lid. Add equal parts rum and water (or just water) to cover the raisins and golden raisins and stir. Add equal parts brandy and water (or just water) to cover the dried cranberries and stir. Let them sit out, covered, at room temperature for 4-5 hours.
DAY 1 at 6:00 PM
Start softening the butter
Remove the butter from the refrigerator and let it come to room temperature.
DAY 1 at 8:00 PM
Prepare the First Dough
Add the flour, sugar and room temperature water to the bowl of a stand mixer fitted with the paddle attachment. If you made your own high-gluten flour, remember to only use 240g of it here in the First Dough. Mix on low speed until the dough just comes together, around 3 minutes. Although this dough starts out very stiff, you'll eventually add a lot of egg yolks and butter, which will soften it considerably.
Switch to a dough hook attachment and continue mixing on low/medium low speed for another 10 or 15 minutes, until the dough is smooth.
Then start adding the softened butter, a little at a time, waiting until it is completely absorbed before adding more. This will take some time. You may have to switch back and forth between the hook and the paddle to mix the dough effectively.
Make sure you do not over work the dough any time during the mixing by checking its temperature frequently. If the dough temperature reaches 79°F (26°C), place the mixer bowl, dough and hook in the freezer for 10 minutes to cool it down before resuming.
After the butter is fully incorporated, start adding half of the egg yolks, a little at a time, waiting until they are fully absorbed before adding more. Once they are incorporated, add the sourdough starter, broken up into a dozen pieces or so, and then add the rest of the egg yolks, again a little at a time until fully absorbed.
Continue mixing until the gluten is fully formed and the dough is smooth and shiny in appearance. The dough needs to pass the “windowpane test” before you are done. Take a piece of the dough and stretch it out until you can practically see through it. If it tears, continue mixing, for a bit longer, perhaps at the next higher speed. The dough ball should pull away cleanly from the sides of the bowl and wrap around the hook when it is done. The dough processing may take 30-45 minutes or more to complete.
When the first dough passes the windowpane test, place it in a large container with straight sides that can accommodate triple the current volume of the dough and cover it with a well-fitting cover or with plastic wrap. Mark the initial dough level so you can tell when it has tripled. If you are using a covered bowl without straight sides, take a small piece of dough and put it in a straight-sided glass, cover it with cling wrap and mark its level. You will use this piece to determine when the dough has tripled in volume. Place the dough (and glass with dough ball, if used) in a warm place to rise for around 12 hours, preferably at around 85F.
DAY 1 at 10:00 PM
Drain the dried fruit
After completing the first dough, drain the raisins, golden raisins and dried cranberries and gently squeeze out the extra liquid. Distribute them evenly on a cookie sheet lined with several layers of paper towels. Cover with several more layers of paper towels and another cookie sheet with a few weights on top to help pull any extra liquid out of the rehydrated dried fruit. (Alternatively, you can just roll the dried fruits up in paper towels.) Let them sit out overnight at room temperature.
DAY 2 at 8:00 AM
Start softening the butter
Remove the butter from the refrigerator and let it come to room temp.
Note: Check on the first dough to see how it is rising. Depending on the temperature, it could take anywhere from 8 to 15 hours to triple in volume. You may have to adjust the times listed below accordingly, depending on your rising environment.
DAY 2 at 10:00 AM
If the dough has not tripled in volume, wait until it does. Once the dough has tripled in volume, proceed with this step:
Prepare second dough
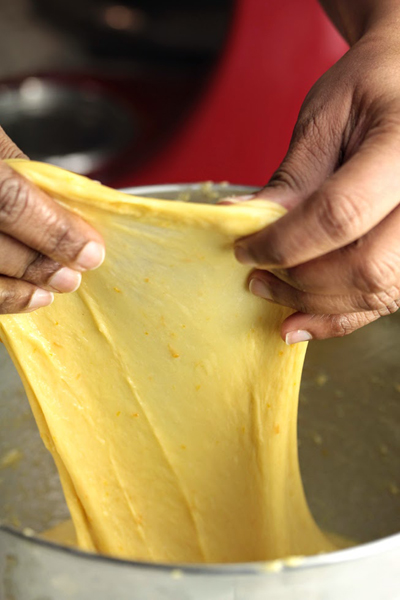
The final dough should be stretchy and pass the Window Pane test
Place your first dough, mixer bowl and hook attachment in the refrigerator for 30 minutes to cool down while you measure out the ingredients.
After measuring the ingredients and cooling the dough, bowl and hook; add all of the first dough, the flour and the aromatic mix to the mixer bowl and mix on low speed with the dough hook until all the ingredients are incorporated, about 10 minutes. You can increase the mixing speed a little near the end of that time. The dough should already wrap around the dough hook and should continue doing so throughout the mixing process after new ingredients are absorbed.
Add the sugar a little at a time, waiting until it is fully absorbed before adding more.
After adding all the sugar, add about 1/3 of the egg yolks, a little at a time, until they're fully absorbed.
Then add the salt and another 1/3 of the egg yolks, mixing until fully absorbed.
Add the softened butter, a little at a time, waiting until each dose is fully absorbed before adding more.
Add the rest of the egg yolks and continue mixing until fully absorbed.
Add the water a little at a time and mix for another 5-10 minutes. Note that it might seem a bit scary to add more liquid to the dough, since it is already very soft. I have reduced the amount of water in this recipe from the amount in the original recipe, because I was frankly too scared to add more water! Follow your own judgement if you are too nervous to add more water. However, while using high gluten flour, the amount of water I list above has always worked fine for me.
After the water is fully absorbed, the dough should be able to pass the windowpane test. If not, mix for another few minutes.
After the dough has passed the windowpane test, add the dried fruit in several doses until it is fully incorporated. The resulting dough will be soft, elastic and very shiny.
Transfer the dough to a container, cover tightly and let it rest in a warm place for 30 minutes.
DAY 2 at 11:30 AM
Pre-shaping, Shaping and Final Proof
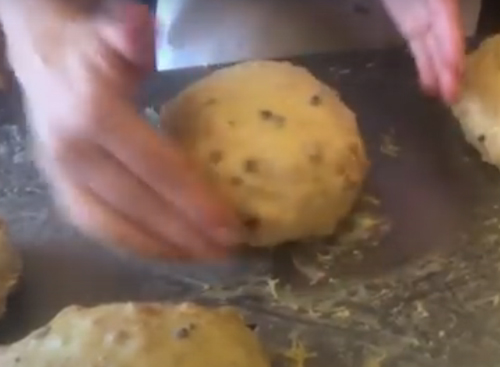
Screenshot from a video showing shaping
After the resting period, turn the dough out onto a clean working surface. It will help prevent any sticking if you wipe a thin coating of soft butter on the working surface and on your hands before this step. Let the dough sit uncovered for 15 minutes. Then measure out two - 550g pieces of dough and set them on the greased working surface. Divide any remaining dough into pieces of about 50g each to make mini panettones.
Form each piece of dough into a ball, by pulling the outside edge of your right hand across the top of the dough from left to right and around the right side of the dough in a clockwise direction. Then use your left hand to perform a similar but opposite motion pushing from right to left across the bottom of the dough and around the left side, again in a clockwise direction. Repeat this motion several times and the dough will form a ball with a taught surface. Italian bakers call this move la pirlatura.
Form all of the other pieces of dough into balls in a similar fashion and then let them rest for 15 more minutes, uncovered.
This is an ideal time to arrange your panettone molds on a baking sheet and pre-skewer them: two skewers running parallel close to the base of the molds.
After 15 minutes, for each dough ball, perform the pirlatura again and immediately scoop it up with a dough scraper and transfer it into one of the appropriately sized paper panettone molds.
Place all of the filled panettone molds onto a rimmed baking sheet.
Cover each mold with a plastic film or plastic bag, and place the entire baking sheet with molds to rise for 8-12 hours in a warm spot, ideally 83-85F.
DAY 2 at 7:00 PM or later, depending on dough expansion
Score and top the panettones, and bake them
When the dough reaches about an inch below the top of the panettone molds at the edges, turn on the oven and heat to 330F.
As soon as the dough rises to about 3/4 inch below the top of the panettone molds at the edges, uncover the molds and leave the dough open to the air to form a thin skin.
When the dough rises to about ½ inch below the top of the molds and is cresting just above the mold in the center, it is time to score the top of each panettone with a cross using a razor blade or a very sharp knife.
If possible, peel the dough skin (four triangles created by the score) back a bit, starting from the center. Place small pats of softened butter on the exposed dough and then return the flaps to their original positions.
Before placing the baking sheet in the oven, make sure you arrange the molds to maximize the space between them, since the tops can mushroom outward as they bake.
Bake the large panettones for 50 minutes at 330F or until the internal temperature reaches 201F. The mini panettone only needs around 40 minutes to bake, so remove that from the oven when it's done, leaving the larger panettones in place. Try not to disturb the large ones too much or slam the oven door because they can and will fall just like a soufflé!
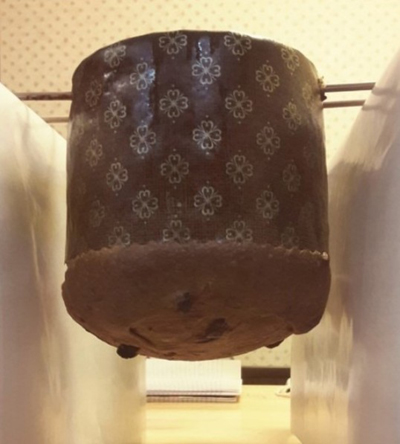
DAY 2 Immediately after Baking
Hang the panettones upside down to cool.
Immediately after taking the panettones out of the oven, push two skewers through the base of each panettone mold, if you did not pre-load the skewers, and turn them upside down, hanging them between two boxes or inside a tall container that can accommodate their size. The panettone crumb is very delicate and will collapse under its own weight as it cools if it is not inverted.
Leave them inverted for at least 3 to 4 hours or overnight to cool. Then you can remove the skewers and enjoy a fresh slice of homemade panettone!
These panettone will keep well stored in a closed bag for at least a week. (Although ours never last that long!) They also freeze very well.
This recipe makes a little over 1.1kg of dough. These are the molds and skewers he uses:
2 5.25 inch diameter paper panettone molds
1-2 2.75 inch diameter paper panettone molds, as needed for extra dough
4-8 Skewers, around 12” long (I use wooden ones, two per mold)
