My Sequence for Spinal Stenosis
The best spinal stenosis exercises either reduce tension through light stretching or activity, or help strengthen the core — the core refers to all of the muscles which wrap around the torso and support both the pelvis and the spine. Think of your core as a strong column that links the upper body and lower body together. Core exercises train the muscles in your pelvis, lower back, hips and abdomen to work in harmony. This leads to better balance and stability, whether on the playing field or in daily activities. Any exercise that involves the use of your abdominal and back muscles in coordinated fashion counts as a core exercise.
How to engage your core
Many exercises tell you to engage your core. The simplest way to engage your core is to brace yourself as if you’re expecting a strong punch to the torso, and then breathe into your stomach. Your core engages naturally right before you laugh or cough, so if you initiate one of these actions, you’ll get an idea of how it should feel when your core is engaged.
Sucking in your stomach and holding your breath are the most common mistakes people make when told to engage their core. Truthfully, this is pretty much the exact opposite of how to engage your corecorrectly.
Rather than sucking your stomach in, you need to focus on pulling your navel up and in towards your spine. When you do this, your abs should feel tightened but you should still be able to move and breath as normal.
A good position for engaging your core is on all fours. In this position, pull your abs up and in towards your spine and keep your torso still whilst you exhale.
Practice Deep Breathing while Exercising
Pay special attention to how you breathe, and practice deep breathing, which should be done through the nose. Most people use only the small part of their lung capacity. As the breathing is shallow, it deprives the body of oxygen and prana. With each inhale, allow your belly to expand. Draw your navel toward your spine with each exhale. Typical yogic breathing is one where "when you inhale, your stomach swells out, followed by your chest and while you exhale your stomach goes in, followed by your chest". This is a deep breathing exercise wherein you soak in maximum oxygen filling in your stomach first followed by the chest and vice versa during exhalation. Couple deep breathing with asana (or guided imagery, mantra meditation, or therapeutic massage), and you’ve given your body and mind one of the most effective relaxation techniques there is.
A few things that are worth keeping in mind while doing any asanas would be:
- Inhale when opening the front of the body. Any asanas that open the front body should be practiced on an inhalation. These include backbends, raising the head, and raising the arms. Cobra pose is a great example of this pairing. As you peel off the floor in Cobra pose, the head is lifted, the chest is expanded, and the belly moves downward. This movement, then, is supported by inhalation.
- Exhale while compressing the front of the body. Forward bending movements tend to compress the front of the body. In Seated Forward Bend pose, for example, the back is stretched and the front of the body contracts. This movement and all forward bends, then, should be practiced on an exhalation. Twists and side bends, which restrict expansion of the chest and abdomen, should also be practiced on an exhalation.
- Breathe deeply and effortlessly. This is the goldest of yoga’s golden rules of breathing. The breath should serve as a guide in all movement. The moment the breath becomes strained or disturbed, the body’s been pushed too far. The goal of any asana is to be completely comfortable and relaxed; to move and hold with deep, effortless breaths. Only then can one derive the benefits from an asana. If the body is under strain and tension, and the breath is adversely affected, the purpose of the asana is defeated—and it’s no longer yoga. Always use the breath as a guide.
1. Start in the Supine Butterfly Pose
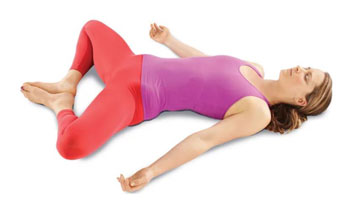
A classic restorative posture, Supta Baddha Konasana or Reclining Bound Angle Pose can be modified for any level of hip and groin resistance. This beginner level dynamic flow is done to open the hips and can form part of the hip opening yoga sequences.
Use this pose for centering:
- Begin sitting on the floor, legs extended. Bring the soles of the feet together with the knees out to the side, making a diamond shape with the legs.
- Lie back either on the floor or a bolster. Place your hands on your belly or out to the sides.
- Close your eyes. Relax your shoulders away from your ears, and begin to observe the quality of your breath. Just note how your breath is - is it shallow or deep? Are your breaths long or short? Then, begin to connect with your breath, setting a bit of intention behind each inhale and exhale. Breathe through your nose. If your mind starts to wander, gently bring it back to the present moment. After three to five minutes, start your yoga practice.
- To come out, use your hands to press your thighs together, then roll over onto one side and push yourself away from the floor, head trailing the torso, and back up to sitting.
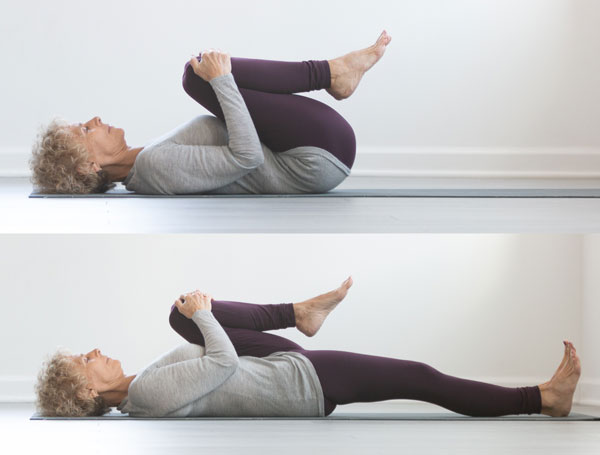
2. Wind Relieving Pose
Stretching the back can help bring space between the vertebrae to offer pain relief. The following knees to chest pose encourages mild lumbar flexion. Stretching one leg out gently stretches the psoas, which is important for those with LSS since a tight psoas could increase the inward curvature of the lower back, exacerbating symptoms.
- Lie on your back with knees bent and feet on the floor.
- Inhale deeply, then on an exhale, draw both knees in toward your chest, resting your hands on your knees or shins and allowing your lower back to flatten. Spend several breaths here.
- Keep hugging your left knee in, then, in slow motion, skim the mat with your right heel as you lengthen your right leg out in front of you, bringing it to straight or as near to straight as it can come without causing the lower back to arch inward. Spend several breaths here, encouraging the right thigh to drop toward the ground, then draw your right leg in, and change sides.
- Slowly return to the starting position. Repeat four to six times trying to stretch futher each time. Gradually increase the hold for up to 1 minute.
- For a more advanced stretch, gently raise the upper back so that the forehead touches the knees.
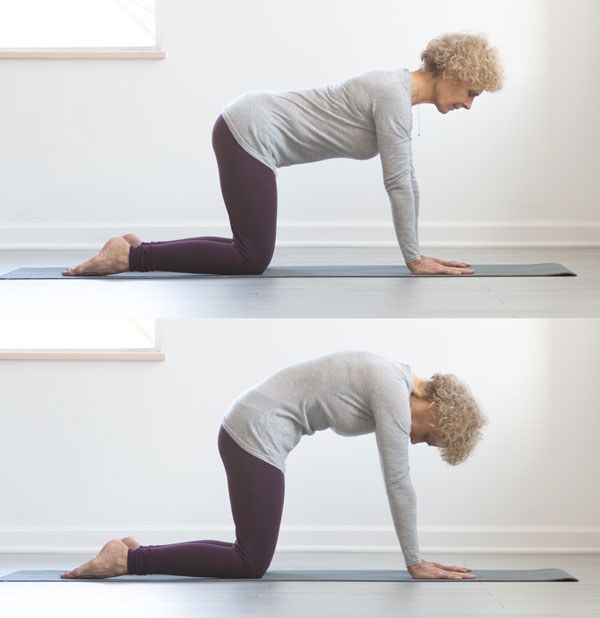
3. Cat-Cow Variation
Cat-cow encourages flexibility in the spine and strengthens the muscles that move the pelvis. In this variation, Go into a modest cat arch if it feels good, emphasizing rounding the lumbar spine, but stick to neutral instead of backbending into cow because spinal extension so often aggravates symptoms of LSS.
- Come into a hands and knees position. On your inhale, instead of the typical “cow,” find a neutral spine, creating a gentle lumbar curve and lengthening the top of your head away from the tip of your tailbone.
- On your exhale, round your spine, gazing toward your thighs.
- Repeat for several breath cycles, each time coming to a neutral spine on your inhale rather than into a backbend.
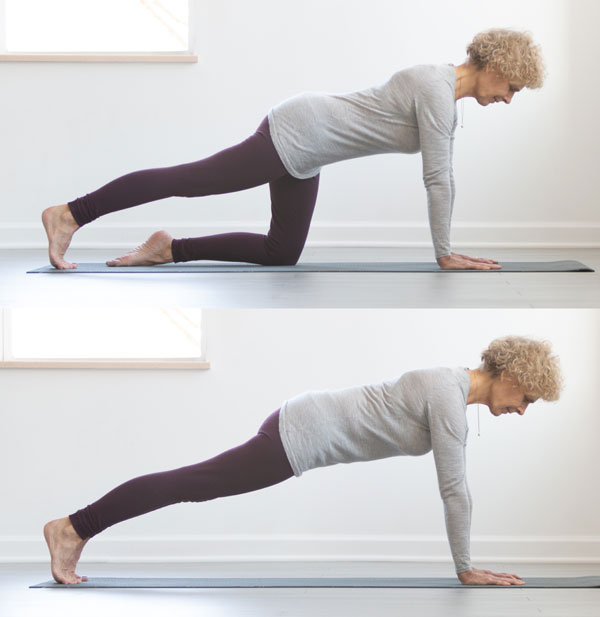
4. Plank Pose
Plank builds core strength, which can help support the lumbar spine.
- From all fours, maintain a neutral spine, and with your shoulders over wrists and the crown of your head reaching forward, step your right foot all the way back.
- Tuck your toes under you and reach back through your right heel.
- Stay here for a few breaths, if this is enough intensity, then change sides, lowering your right knee and stepping your left foot back; or, for more intensity…
- Step your left foot back alongside your right, feet hip-distance apart, heels reaching back as the crown of your head reaches forward.
- Stay in plank for several breaths, drawing your belly in and up on your exhale, before lowering your knees down to the mat.
5. Forward Fold to Mountain Pose
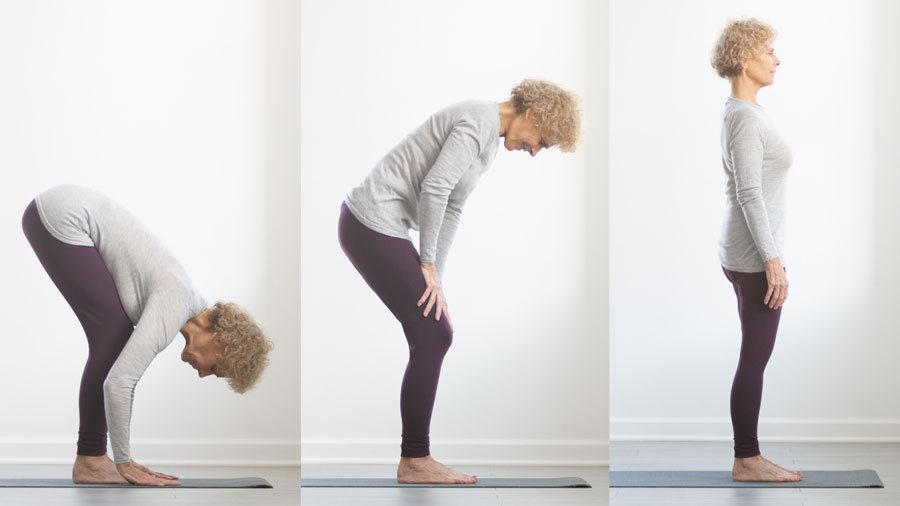
Controlled forward folding often helps to relieve LSS symptoms, and walking the hands up the thighs to come up is a transition that does not place stress on the lumbar spine.
- Walk your feet forward from downward facing dog and bring your hands to blocks, to your shins, or thighs (and feel free to bend your knees as well) until you have found the perfect place for you: a forward fold that yields a sense of relief.
- Press down with your feet and bend your knees however much is comfortable for you as you walk your hands up your thighs to come up, with a long spine, to standing.
6. Mountain Pose at the Wall
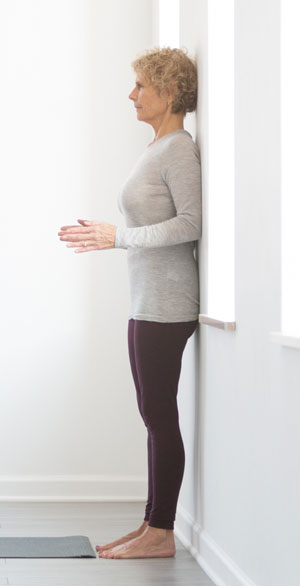
Using props can enhance your self-perception, allowing you to clearly perceive the components of a neutral spine.
- Stand with your back against a wall, feet a few inches away from it, hip-distance apart and parallel. Ideally, although your lower back and the back of your neck will curve gently away from the wall, your buttocks, your mid and upper back, your shoulder blades, and the back of your head will all touch the wall.
- To bring your shoulder blades toward the wall, make robot arms, pressing the backs of your upper arms to the wall as you bend your elbows at right angles alongside your rib cage.
- Shrug your shoulders up, move them back, then move them down your back and toward each other.
- If this neutral alignment creates discomfort in your lower back, bend your knees and walk your feet forward enough that your lower back flattens against the wall.
- Keep robot arms or relax your arms alongside you as you remain here for a few breaths, rooting down through your feet, lifting up through the crown of your head, and noting the interrelationships that compose a neutral spine so you can recreate it later and often.
7. Warrior I Variation
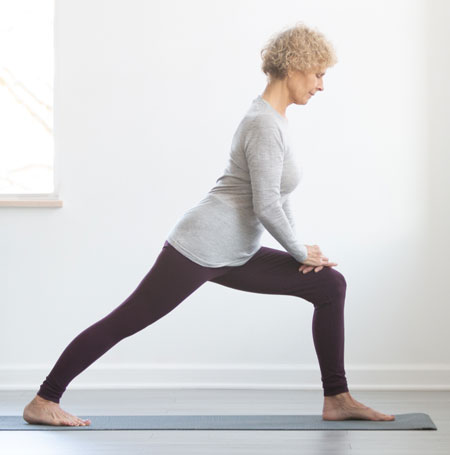
Flexing the lumbar spine by leaning forward in poses like warrior I may afford relief of stenosis symptoms, while the more upright position will stretch the psoas. Lengthening the psoas can help to prevent or reduce the lumbar lordosis (inward curvature of the lower back) that often causes symptoms for those with LSS.
- Return to the top of your mat. Root down with your left foot and step your right foot a big step back behind you. Position your feet about hip-distance apart and aim your right big toe toward the front left corner of your mat.
- Bend your left knee and lean over your left leg until your lower back flattens, placing your hands on your left thigh near the knee (or bring your forearms to your thigh if a deeper fold is necessary for comfort).
- Stay here for several breaths, reaching your heart forward, or experiment with walking your hands closer to your left hip and bringing your spine to a more upright position.
- (If a vertical spine feels good, feel free to take a more traditional warrior I: Reach your arms forward and up as high as you comfortably can.) Spend several breaths here, then step your right foot forward and change sides.
9. The Child’s Pose
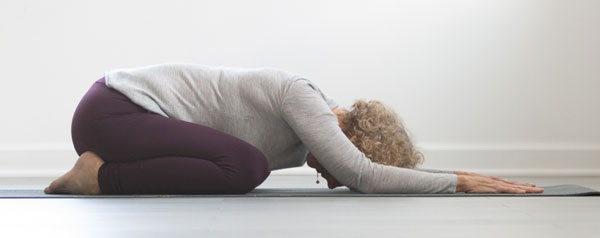
In child’s pose, the lumbar spine is gently flexed, a position that offers relief to many with stenosis. It’s a controlled, partial flexion making it safer than deep or abrupt forward folds.
- Start by getting down on the hands and knees, hands directly beneath your shoulders and knees below your hips. Aim your tailbone towards the wall behind you and the crown of your head to the wall in front of you. You should feel your low belly and abdomen engage when you complete these two actions.
- Inhale deeply, and on a long, slow exhale, gently sit back on the heels.
- Spread the knees comfortably apart and bend forward so your neck is lengthened and your forehead is resting on the floor, reach your arms forward until the they are outstretched in front.
- Breathe into this stretch for five deep breaths, then slowly return to the starting position. Aim to complete 4 to 6 repetitions of this stretch.
- Build up so your are resting in this pose for up to 5 minutes.
10. Savasana
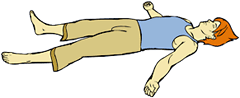
The Corpse Pose (also called The Sponge)
Lie on your back, feel spread about 18 inches apart, and hands about 6 inches from your sides, palms up. Ease yourself into the pose, making sure the body is symmetrical. Let your thighs, knees and toes turn outward. Close your eyes and breathe deeply.
Abdominal Breathing
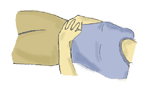
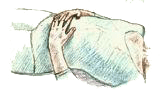
When you inhale, push out the stomach; this movement causes the diaphragm to descend and the lower part of the lungs to be filled. Then the middle part is filled by expanding the chest and finally the top of lungs, by lifting and expanding the upper ribs. This is done in one smooth, continuous movement, without any jerking.
To check that you are breathing correctly, exhale and place your hands on your abdomen, fingers loosely interlocked. When you inhale, your abdomen should rise up, separating your hands.
The Corpse Pose or Savasana is the classic relaxation pose, practised before each, between asanas and in Final Relaxation (see further below). It looks deceptively simple, but it is in fact one the most difficult asanas do well and one which changes and develops with practice.
When you first lie down, look to see that you are lying symmetrically as symmetry provides proper space for all parts to relax. Now start to work in the pose. Rotate your legs in and out, then let them fall gently out to the sides. Do the same with your arms. Rotate the spine by turning your head from side to side to centre it. Then start stretching yourself out, as through someone were pulling your head away from your feet, your shoulders down and away from your neck, your legs down and away from your pelvis. Let gravity embrace you. Feel your weight pulling you deeper into relaxation, melting your body into the floor. Breathe deeply and slowly from the abdomen, riding up and down on the breath, sinking deeper with each exhalation. Feel how your abdomen swells and falls. Many physiological changes are taking places, reducing the body's energy loss, removing stress, lowering your respiration and pulse rate, and resting the whole system. As you enter deep relaxation, you will feel your mind grow clear and detached.
