Shoulder Stand (Sarvangasana)
from http://www.abc-of-yoga.com/
The Shoulder Stand stimulates and rejuvenates your entire body. In this exercise, you build up both power and a new structure in your back and you relax tension in well-known stress areas like the neck and the lower back. The muscles of your lower back get stronger, the chest and shoulders can move more freely and the back gets straighter. The Shoulder Stand also stimulates the thyroid gland and is good for blood circulation in the chest, shoulders, upper back and the neck.
 |
STEP 1: Lie down with your back on a Yoga Mat. |
|
STEP 2: Your shoulders should lie on the edge and your head rests on the mat. Your legs are drawn in and still stand on the mat. |
|
STEP 3: Lift your hips off the floor and bring your legs up, over and beyond your head. |
|
STEP 4: At this point, lift your back and move your legs further beyond your head. |
|
STEP 5: Straighten your spine and keep your back straight. Move your hands toward your back. |
|
STEP 6: Place your arms against your upper back and try to place your hands as near as possible to the shoulder blades. Try to place your elbows at shoulder-width. If you cannot do this, put them at a somewhat wider distance from each other. If you want, you can use a belt to keep the arms together. |
|
STEP 7: Push your back upwards with your hands. You will get a force upwards coming from the seventh neck-vertebra. |
|
STEP 8: Lift up your legs, one at a time, and see to it that the pelvis is placed straight over your back and your hands. Your legs are placed a little forward. Divide the weight of your legs between the hands and the shoulders. Build up strength in the upper lower back and give space to your chest and shoulder muscles. |
|
STEP 9: After some time, try placing your arms a little lower in the direction of the shoulder blades on your back. See to it that the elbows do not stand too far apart. Breathe in and out quietly and try to find your balance. |
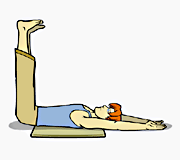
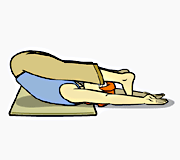
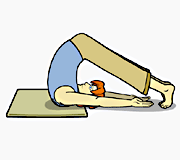
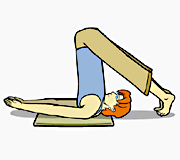
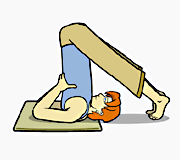
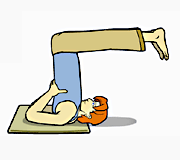
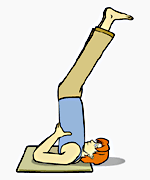
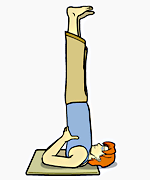
Remark:For people who practice Yoga and have stiff muscles and a weak lower back, this Asana may be quite difficult. As a general rule, it may be said that healthy pain and discomfort are things that quickly disappear when the exercise is over.
There are three important power lines in the Shoulder Stand:
- from the upper back inward and upward
- from the chest upward
- from the sacrum to the pelvis
Check these connections constantly and build up the exercise quietly. Never force yourself and never lose sight of the element of relaxation during your efforts.
