The Decluttering Cure (September 2020)
from https://www.apartmenttherapy.com/
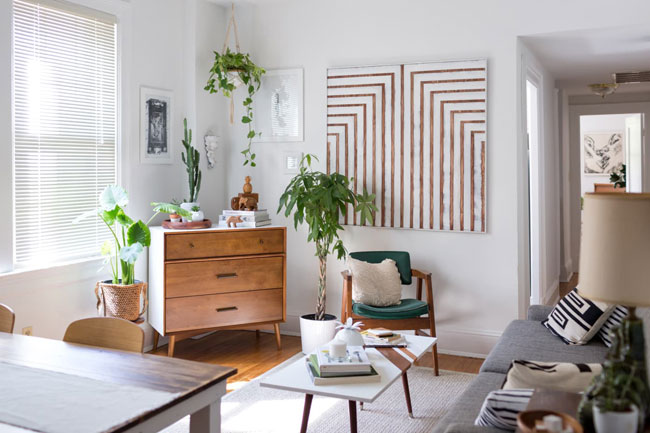
Maybe you’re a clean person like me who fell off their game. Maybe you’ve always been more laid-back about tidying up, but all this time indoors has brought the clutter into un-ignorable focus. Or maybe you’re already pretty clean, and looking for a low-effort way to check back in with your organizing and storage solutions. No matter your relationship to clutter right now, you’re in the right place.
Today, we’re kicking off the Decluttering Cure. It’s a new name for a tried-and-true concept: Working smarter, not harder, to get your space cleaned up in just 20-ish minutes a day, for 20 days.
I’ll be sending you daily assignments designed to help you re-frame your relationship to your stuff. I phrase it that way for a reason: the goal isn’t necessarily getting rid of things. In fact, some days I’ll prompt you to just sit and think, or set up systems to help you better deal with the influx of things (mail, shoes, groceries) that come with operating a household. And yes, some days we’re doing the hard work of, for example, clearing out your wardrobe. But I’ll never give you a rule like “you can only keep five t-shirts.” My personal approach to decluttering isn’t to give you ultimatums, it’s to guide you to making those decisions for yourself.
Day 1: A Tidier Home in 20 Days! The Decluttering Cure Starts Today with One Quick Assignment
Day 2: Learn our five decluttering rules, then use them on a drawer.
Day 3: Do a timed 20-minute declutter in your living room: Everyday clutter
Day 4: Try this five-part system for handling paper clutter.
Day 5: Do a “one-room reset” in an area of your home.
Day 6: Declutter your clothes.
Day 7: Do a timed 20-minute declutter in your entryway area.
Day 16: Set up a home landing strip. (from January Cure)
Day 8: Make one effort to prevent clutter from entering your home.
Day 9: Here’s a Game Plan for Decluttering Your Kitchen in 20 Minutes
Day 10: Work through some of your aspirational clutter.
Day 11: Do a timed 20-minute declutter in your bathroom.
Day 12: Do a timed 20-minute declutter of your fridge, freezer, and pantry.
Day 13: Streamline your sentimental clutter.
Day 14: Identify a problem area, and set a plan to attack it.
Day 15: Do a timed 20-minute declutter in your bedroom.
Day 17: Get your sofa into shape. (January Cure)
Day 16: Take a catch-up day.
Day 17: Set up a “junk zone” in one of your rooms.
Day 18: Find a home for stuff you store on the floor.
Day 19: Try the “box and banish” method with your “maybe” items.
Day 20: Sell or donate the things you decluttered.
Day 1: A Tidier Home in 20 Days! The Decluttering Cure Starts Today with One Quick Assignment
You’re going to have plenty of things to cast out of your home for good by the end of this challenge, so today’s assignment is just to set up a three-box drop zone.
Decluttering Tip: If you’re taking on a multiple-day decluttering project, you can save time by sorting each day’s haul into “sell,” “donate,” and “maybes” boxes. It makes it quick and easy to get everything out of your home when you’re totally done.
Find a spot that’s convenient but won’t get in your way—like the area under your desk, a spot in the garage, or just in a corner somewhere—and that’s big enough to stash three big boxes. Your “boxes” can be baskets or garbage bags or whatever you have lying around. All that’s important is that you have three of them, and label them accordingly:
- “Sell”: This box will ultimately be for items you think have value, just not for you right now. If you’re not the selling type, feel free to skip this one.
- “Donate”: For things that are in good shape but not worth selling, or things you want to give away to friends or family, or that you can find a better home for.
- “Maybes”: We’ll use this box along the way to collect objects you’re not sure about. Maybe it’s something you’re on the fence about tossing, or that doesn’t really have a home in your home just yet.
Once you’ve got your three “boxes” set up and labeled, that’s it for today! Don’t worry about filling up these boxes just yet—we’ll get to that tomorrow.
Day 2: Learn our five decluttering rules, then use them on a drawer.
Decluttering is a mental exercise more than a physical one, if you ask me. Taking a random charging cable out of your junk drawer and placing it into a donation box isn’t a big challenge for many people. But getting over your mental roadblocks is tougher: After all: What if you need that cable? The solution is becoming a ruthless, confident declutterer. And that transformation starts with a solid set of rules. Which brings us to day two of this Decluttering Cure challenge…
Decluttering Tip: When you’re decluttering, ask yourself five questions:
- Have I used this item in the past year? This one’s easy. Try to remember a time when you used the thing you’re weighing on. If it hasn’t been worn, used, or appreciated since last fall, let it go.
- Will I use it in the year ahead? Try to resist any thoughts about how you “might” use it, and find something more concrete: Will you use it? If you don’t have a real need or plan to do something with it, the answer is “no”.
- Would I buy this again today? Does it work? Does it fit? Do you have another thing that does the same job? Do you even like it anymore? Try to be present and mindful about your current tastes, habits, and priorities.
- Is it worth fixing, if it’s broken? Consider whether you would use the broken item if it were in good shape (see question number 3 above). And weigh the cost of fixing the thing against the cost of replacing it. And will you actually get it done? Soon?
- Would I keep this if I moved? Would it be worth packing up, moving, and unpacking in a new space? We tend to be a little more ruthless and honest with ourselves about what stays and what goes when we’re moving from one home to another.
If you answer “yes” to any question (even the first question), that item is an automatic keeper. But if you can run through all five questions and have to honestly say “no” to every one, that item needs to go into the donate or sell boxes you set up on day one.
Now that you know the rules, your assignment today is to use them to declutter one tiny spot at home. Choose a drawer in your kitchen, a bin under the bed, or a cabinet in the bathroom. Take everything out and put each item through the five-question assessment. Keepers go back in the drawer, bin, or cabinet, and the tossers go into your boxes.
Day 3: Do a timed 20-minute declutter in your living room.
When you’re decluttering, clutter is your enemy. And you have to understand your enemy to defeat it. So here’s a quick 101 lesson on two types of clutter.
In some storage areas of your home, closets and under the bed for example, you’re harboring “long-term” clutter: stockpiles and collections of things you may or may not need to hang on to. But there’s also “everyday” clutter—those scattered personal effects that end up crowding your open surfaces if left unchecked for too long. We’re going to address both types during the Decluttering Cure.
Decluttering Tip: The best way to handle “everyday” clutter is to make tidying up a part of your routine. Schedule a quick pick-up every week, or more often if needed.
To get you into the habit of picking up everyday clutter, we’re going to take on six different decluttering sweeps of rooms and areas at home in the course of this 20-day challenge. They’re timed—the goal for each day isn’t a spotless space, it’s cleaning up as much as you can in 20 minutes, to build a habit you can keep up year ’round.
Today we’ll start in the living room…
Here’s how it works: Set a timer for 20 minutes, and head into your living room with a laundry basket (or something else to collect clutter with). While the timer is counting down, venture around and collect as much clutter as you can into your basket.
You’re looking for anything that’s out of place, including stuff that needs to be trashed (or maybe just needs to find a new home). Remember the five decluttering rules from yesterday—if you wouldn’t buy it again or take it with you when you move, it might be time to let it go.
Be sure to look under and around the sofa, cubbies/drawers, bookcases, shelves.
Look for CDs, DVDs, or vinyl records you don’t listen to or watch, Video games, Extra gaming accessories you don’t use, Board games or puzzles, Broken, outdated, or unused electronics, Chargers and cords, Random objects and decor you don’t want to keep any more.
Gather it all up in your basket. When the timer stops, you can stop too. Empty your laundry basket by returning things to their rightful place, or by discarding anything you don’t want into your “sell” and “donate” boxes from day one.
Day 4: Try this five-part system for handling paper clutter.
Have you ever let a coupon sit in a pile of mail on your dining table for so long that it expired before you even saw it? I have. I’ve worked and eaten around paper piles on my dining room table for weeks, lying to myself thinking they’d be filled with important correspondence that required tons of attention, when really I was just sliding around a pile of 28 flavors of junk mail and one (1) random insurance statement. And maybe a card from a friend that it’s embarrassingly late to reply to now.
My point is this: Paper clutter is one of those things that seems so much harder to declutter in your head than it is in real life. And finally sorting those paper piles will give you a sense of control and I-have-my-life-together-ness that is truly unparalleled in this current era of life.
Here’s how to do it…
If you already have a good thing going with the way you handle mail and other papers, stick with it! But if your current system isn’t working like it should be, you may be missing a plan for one of these five important categories of paper clutter.
Decluttering Tip: Each one of these five paper clutter categories should have a “home” inside your home: trash, action items, short-term, long-term, and leisure reading.
- Trash and recycling: Toss your envelopes, inserts and bulk mail right away. For anything sensitive, if you have room for a shredder, great. If not, just tear it up with scissors or your hands.
- Action items: This category is for anything that needs doing, like bills that need to be paid. A good place for this type of mail is in or near your workspace.
- Short-term: This includes coupons you might want to use, or anything else you might want to reference in the near future. Give these a home where you’ll see and remember them. You can stick them to the fridge, or stash them in a basket or tray somewhere. I have mine in a paper sorter on the kitchen counter.
- Long-term: Anything you need to keep for your records should have a permanent (and ideally, fire-safe) place, so you can file paperwork the day it arrives.
- Leisure reading: These are your catalogs, magazines and newsletters. You should drop them wherever you hang out at home—like right next to the sofa or on the coffee table.
Decluttering Tip: When you’re filing long-term paperwork, remember the law of diminishing returns: File them away hastily today, and dedicate more time to the search when you (rarely) need to reference something.
Like I said, this system doesn’t need to be perfect. Once you have a spot in mind for each of the categories of paper, you should put it into practice on the paper piles you have at home right now. Here’s what to do: Gather all your paper piles up from around the house into one monster paper pile, then use these five categories to sort and send all the paper clutter to its proper home.
If you have way too much paper clutter to handle right now, just focus on going through just one small zone—like your dining table, entryway, desk, or kitchen counter.
Day 5: Do a “one-room reset” in an area of your home.
Eliminating noisy distractions sure does a lot to clear your head. You can harness that same energy when it comes to your home.
Decluttering Tip: If you’re overwhelmed by the visual clutter in a room, clear the room down to just the essentials and layer only what you need and love back in.
The one-room reset is a simple exercise that helps you not only reduce visual clutter, but also make over your space to keep things fresh and interesting.
Here’s how it goes…
Choose one room or area of your home to reset. You might choose a room where you spend a lot of time, or one zone—maybe a bookshelf—that stands out as a problem area in your home.
Walk around the room and clear off decorations and other objects from your surfaces and place them aside, into a box or even just in the corner of another room. Clear out anything that’s decorative—artwork, tchotchkes, pillows—and strip this space down to just the essentials. The goal is to leave yourself a totally blank slate. (This is a great opportunity to deep clean this space, too!)
That’s all you have to do today: clean the space out. Because I want you to live with the room as-is for a while—a day, a week, or more—to gain clarity about what you need in this space.
Whenever you’re ready, you can add things back in—one thing at a time, or all at once. If you want to bring everything back to exactly where it was, go for it. But more likely, you’re going to learn some lessons about what sorts of things are valuable to you, and how much visual decoration is “too much.” These are insights you can carry with you through the rest of this Cure, and really any home decluttering project to make smarter decisions about what should stay and what should go.
After a while, anything you don’t want to layer back into the space can be put to use in another room, or placed into your sell, donate, and maybes boxes from day one.
Day 6: Declutter your clothes.
Your wardrobe is one of the most emotional categories of items to declutter (maybe second only to sentimental clutter—but that’s a conversation for day 13). There are so many feelings wrapped up in the clothes you wear. When you start thinking about who you want to be, where you want to go, how you want to look, and how much space you take up in the world, well it’s no wonder you can only say goodbye to a few measly pieces. But I bet you wish you had some more room in your closet and drawers right about now, don’t you?
So here’s the answer: The first thing you should do when you’re decluttering clothes is take everything out.
Decluttering Tip: When you’re culling through a collection, you should spend your time thinking about what you want to live with, instead of what you can live without.
Don’t pluck through your clothes trying to find things to get rid of. Empty the drawers. Take all the hangers off the rod. Pretend none of those clothes are yours anymore, then layer in the things you love the most. That’s the key to making a big dent in your wardrobe.
You can use this method anywhere in your home (and you will!), but I’ll walk you through the closet process below…
If you don’t think you can get through all of your clothes in the time you have available today, it’s OK to focus on just what’s hanging up, or just what’s in the drawers, or maybe even just one drawer. But it’s important to stick with the “everything out” method so you can make the best choices about the things you love having in your life and in your wardrobe. There will be time for everything else later.
- Take everything out: Everything! Lay it on the bed, or on a sheet on the floor.
- Sort into piles by category: For your clothes, that might be: jeans, tops, dresses, etc. Do whatever makes sense for your wardrobe.
- Choose two or three favorites from each pile to keep: Put the things you want to keep back into the closet or dresser. Instead of thinking about what you want to live without, we’re being mindful of what you want to live with.
- Keep going, picking favorites until your storage is full: Once you’ve got just the favorites in place, keep adding favorites from each category, one by one, until your previously-empty storage area is full.
- Get rid of everything left in the pile: You don’t have room for it, and you don’t love it as much as you love everything else.
I know this is a big one for some people, so I want to stress that you don’t bite off more than you can chew. This everything-out method is smart, but it does require a commitment, so if you want to work space by space and stop when you feel finished, that’s ok! We’re all about progress, not perfection.
Day 7: Do a timed 20-minute declutter in your entryway area.
Entryways are working real hard right about now. They’ve always been a barrier between you and the outside world: preparing you to leave for the day with confidence, and welcoming you home with support when you return.
Today, your entryway is also home to some new daily staples, like hand sanitizer and face masks. Meanwhile, your purses and totes might not be getting the use they used to since you stopped commuting. All of this is to say: It’s a great time to check in and make sure your entryway is set up for success—whatever that means these days.
Here’s a quick effort to help you tidy it up…
We did this a couple days ago in the living room, but here’s a recap of how a timed decluttering exercise works: Set a timer for 20 minutes and head to your entryway area. Be it a foyer, mudroom, counter, console, or wall area—we’re targeting whatever room or spot in your home that acts as a reception when you come home each day. You may also want to grab a laundry basket or something similar. If 20 minutes feels like way more time than you need, feel free to set your timer for 10 minutes, or whatever feels right to you.
While the clock is counting down, look for anything that’s trash, out of place, or just ready for a new home and gather it all up into your basket.
Where to Look: console table tops, shelves drawers, inside cubbies or baskets hooks and coat racks, the coat closet, inside your totes and bags
When the timer stops, return everything to its proper home, or into trash, recycling, or your “sell” and “donate” boxes from day one.
Day 16: Set up a home landing strip. (from January Cure)
Set up a welcome zone — we call it a landing strip — near the front door (or garage door, or wherever you most often enter your space).
You can compile this together from pieces and things you already own. Raid the kitchen for a bowl, for example, or borrow decorative items from other rooms.
The components of your landing strip might include:
- A rug or mat to wipe off your shoes.
- Wall hooks, or usable space in a coat closet to hang your outerwear and bags.
- A dish or hook for your keys.
- A bowl or container for change and your wallet.
- A surface — like a shelf or side table or small corner of a console — to sort the mail and other items (newspapers, books, magazines, purchases) as they come in.
- A small wastebasket and/or recycling bin to hold your discarded incoming mail and other stuff to be recycled (you can also consider a shredder here).
- A mirror for last minute check ups before you walk out the door.
It doesn’t matter how you orient or style these things. They can be clumped in one stop-and-drop area, or scattered around a small space. All that matters is that you can easily unload your things when you walk in the door. Then you just have to make it a habit.
If you’ve done the Cure before, you may already have a space like this set up, but there’s always room for improvement. Do you need more hooks? A place for papers? Use this time today to assess how your existing landing area is working for you.
Day 8: Make one effort to prevent clutter from entering your home.
It feels like decluttering never ends. Because… it doesn’t. I’m sorry to be the bearer of bad news, but the stuff you welcome into your home today is just tomorrow’s clutter.
But the good news is: That should make you feel more in control! You have the power to stop clutter before it even happens by bringing fewer things inside in the first place.
The whole concept of “bring home fewer things” comes easier to some people than to others. If you struggle with it, I want you to spend some time today really thinking about how clutter comes to be. You may start to realize that your frustrating clutter problems start long before the drawers won’t close and the closet won’t shut.
Decluttering Tip: Work backwards from your clutter problem areas and find ways to prevent that type of clutter, like canceling catalog subscriptions or making a one-in/one-out rule for clothes.
While it’s not always obvious which of today’s things will become tomorrow’s clutter, there are a few universal things you can do to prevent clutter in your home.
Here are a few to start with…
Yep, to fulfill your duty to the Decluttering Cure challenge, just choose one thing from this list… and do it. Leave the note, call the customer service number. Then put your feet up and revel in your clutter-stopping superpowers.
Easy Ways to Prevent Clutter from Happening in the First Place
- Cancel a magazine subscription. That title you haven’t read in a while? Just cancel it, or subscribe to their website instead. Or just buy the one issue you always look forward to on the newsstand.
- Stop the influx of catalogs. There’s usually a 1-800 number on the back of every catalog; call and request they take you off the list.
- Get your address off physical junk mail lists. There are services that will help you: Check out How to Eliminate Junk Mail (& Email) Once and For All.
- Sign up for online statements from your banks, utility providers, and credit card companies.
- Set a recurring weekly reminder to digitize any papers you’re keeping “just in case.”
- Put a trash can or paper shredder by the door where mail comes in.
- Think twice before you print something out from your computer. Could you store this digitally instead? Tape a reminder to your computer, or remove the paper from your printer tray to give you a reason to pause.
- Set up a permanent donation basket near the front door and commit to making weekly or monthly trips to empty it.
- Implement a one-in, one-out rule for clothes or books or toys.
- Talk your friends or family into a “no gift” pact for the holidays this year. Or for next year’s round of birthdays.
- Tattoo “Say no to free stuff” on the palm of your hand. (Or leave yourself a reminder like that’s a little less permanent—like a phone background.)
- FMM: My own tip: Don’t buy something just because it is on sale. Be sure it is something you will use and that it just doesn’t sound like a good deal at the time. Also, if you already have 5 of often used items, you probably don’t need 5 more.
Day 9: Here’s a Game Plan for Decluttering Your Kitchen in 20 Minutes
The kitchen can be such a black hole for storage, because everything in it feels necessary. When it comes to tools and cups and food storage containers, no amount feels like enough. And in your mind, you probably have a use for all of it.
That’s fine. Hang on to as much as you want in the kitchen, especially now. Even the things you use once a year—like the apple corer that helps you with the first (and last) pie of the season—can have ritualistic and emotional value.
Decluttering Tip: Be honest with yourself about the value your items have: If it’s more about emotion than function, maybe you can store it in a different place, or keep the memory in some other way, like framing a photograph of it.
But I am here to help you declutter, so my “hang on to anything you want” advice only extends as deep as your cabinets do. If you find it hard to find tools when you need them—or let out a few colorful curse words every time you unload even more water bottles onto an already-toppling stack of them—it’s time to let some things go.
So let’s try a quick sweep of your kitchen storage today…
Day 9: Do a timed 20-minute declutter in your kitchen.
If you’ve been following along with this Cure, you know the drill by now: Set a timer, grab a basket, and go through your kitchen looking for things that are either out of place, or ready to be tossed and given a new home far away from yours.
But first… there are a few places not to look: The fridge, freezer and pantry can be spared today, because we’ll be coming back for a pass at decluttering those food storage spaces in a few days.
Where to Look: cabinets drawers, on the counter, on top of the fridge or cabinets, any freestanding furniture, like a hutch or island, the bar or bar cart, anywhere you store cooking and serving supplies, even if it’s not “in” the kitchen.
What to look for:
- Anything that belongs in another room
- Broken cups, mugs and plates
- Multiples you have too many of
- Kitchen tools you never use
- Duplicate kitchen tools or measuring cups
- Small appliances that you never use, or that you use so infrequently you can probably find an alternate technique or borrow from a friend
- Baking sheets, pans, pots, and cutting boards that sit untouched
- Holiday-themed serving pieces that didn’t get used last holiday
- Novelty accessories
- More than two-ish bottle or wine openers
- The fifth and sixth water bottles you never get to using
- Old, gross cleaning supplies
- Old, stained, or extra plastic containers
- Takeout condiments, plasticware, and stray menus
- Out-of-date invitations or event announcements
- Expired coupons
- Excessive collections of paper or plastic bags
- Expired medication
- Bottles of liquor that don’t ever seem to get drunk
- Cookbooks that haven’t been cracked open in more than a year
A lot of these things can be recycled or donated, so don’t opt for the trash can unless you have to.
Day 10: Work through some of your aspirational clutter.
Removing This One Type of Clutter from Your Life Is an Act of Self-Love
I’ve been writing professionally about clutter for more than a decade now, but that doesn’t mean I have it all figured out. In fact, earlier this year, I had my eyes opened to a category of clutter that I never knew existed. Well, I know this clutter exists the same way I know popliteal fossae exist: I have some, but I never knew it had a name. (The “popliteal fossa” is a kneepit, by the way.)
This new-to-me clutter category is aspirational clutter.
Richa Goel wrote about aspirational clutter for The Financial Diet, detailing how she acquired lots of things—clothes, equipment, books—for an fantasy version of herself. Aspirations are great, of course, but not if they come with baggage. Goel decided to part with some of her aspirational clutter after realizing that she wasn’t hanging onto tools that served her, but instead, those things were just constant reminders of ways that her current self wasn’t shaping up against the fantasy of who she wanted to be.
Decluttering Tip: Aspirational clutter is anything you’re keeping for a future version of yourself. Clear it out if you need more mental or physical space for who you are right now.
Goel summed it up nicely: “My point is to develop awareness and let go of other things so I can make space for my true dreams and turn them into reality.”
So that’s our goal today…
This task is, ultimately, deeply personal. I think the best way to go about this is to do a walkthrough of your normal morning or evening routine (as normal as it is these days). Open your usual cabinets, walk through the usual spaces, maybe go fake-searching for something you might have fake-misplaced that morning. But do it all with your mind poised to identify if there’s any aspirational clutter getting in your way, mentally or physically.
Aspirational clutter is defined by two criteria:
- These are idle things you’re keeping only for a future version of yourself, and…
- They’re things that create an obstacle for you today, whether that’s taking up much-needed space or digging at your self-esteem
The guitar you hang on the wall and pick up every once in a while to practice your plucking is not aspirational clutter. But a dusty yoga mat that you have to nudge out of the way every time you reach for your favorite jeans is aspirational clutter.
When you come across anything that feels more like the latter, just confidently carry it over to your donation box from day one. Or, if you’re really finding it really hard to part with, put it in the “maybes” box—that’s what that’s there for, after all. Just take that effort to remove aspirational clutter from your life, a little bit at a time. Then see if you don’t feel better with those things out of sight and out of mind.
Day 11: Do a timed 20-minute declutter in your bathroom.
The bathroom is my favorite room in my home. I’m not sure if that’s an unpopular opinion or not, but no matter where the bathroom ranks on your personal favorites list, it’s a space worthy of sprucing up, for everyone.
If you share your home with others, the bathroom might be the most truly private place you have. A space where you can be alone with your thoughts. A place to look yourself in the eye as you give yourself pep talks to gear up for a big day, or a place to wallow in your own tears, analyzing your cry face, on a bad one.
For all that your bathroom provides you, don’t you owe it 20 minutes to comb through the cabinets, looking for clutter to lighten the whole room up? (Not to mention make it easier to find what you’re looking for when you’re showering and primping.)
That’s what we’ll focus on today…
Take 20 Minutes to Declutter These 20 Things in Your Bathroom
Set a timer for 20 minutes and use that time to clear as much clutter out of your bathroom as possible. Take a laundry basket or another similar container with you to quickly collect anything that’s out of place. If you have more than one bathroom, focus on the one you use the most often.
Where to Look: on the vanity or countertop, in the medicine cabinet, inside your makeup bag, dopp kit or travel case, inside drawers, under the sink, in the linen closet, inside the shower, inside standing or wall-mounted organizers
What to look for:
- Expired medication, makeup, and sunscreen
- Empty or almost-empty products (get the dregs out and get rid of them)
- Stretched out hair ties and broken bobby pins
- Any lotions or other products that have separated or smell rancid
- Makeup or products that you haven’t used in more than a year
- Unused makeup and skincare samples
- Unused hotel toiletries
- Old nail polish that’s separated
- Duplicate shades of nail polish, or shades you never use
- Old toothbrushes you’ve kept “for cleaning,” but haven’t repurposed
- Any kits (like teeth whitening) you forgot to follow through with
- Old, broken, or unused hair styling tools
- Duplicate hair tools, like combs and brushes
- Duplicate tweezers, nail clippers, eyelash curlers, and other tools
- Anything you keep “for traveling” but never actually pack
- Accessories for tools you don’t have anymore, like chargers and replacement toothbrush heads
- Extra buttons, thread, or safety pins
- Hair accessories you haven’t worn in more than a year
- Jewelry you don’t wear, or can store somewhere else
- Cleaning supplies that belong in another room of the house
When your timer runs out, take all of the things you collected and either sort them into the trash or recycling, or set them into your boxes to be donated, given away or sold.
Day 12: Do a timed 20-minute declutter of your fridge, freezer, and pantry.
I’m eating and cooking at home a lot more than I used to, and frankly, my kitchen can’t really keep up. You see, I was used to restaurant kitchens sharing some of the burden of storing and preparing food in my house. But now it’s all on me—and my fridge, freezer, and pantry have been overflowing at times.
The thing is: The longer you ignore the black holes in your kitchen, the harder it becomes to cook, eat, and even just store a leftover delivery pizza without setting off a chain reaction that ends in your eggs crashing to the ground.
Decluttering Tip: Try to clean out your fridge, freezer, and pantry weekly or bi-weekly. It helps to tie it to your existing routine; try clearing out the kitchen before each time you grocery shop.
So if clearing out your food storage areas is a task you haven’t done in a while, today is the day to get it done. We’ll approach this with our timed room-sweep technique.
Here’s how to begin…
You’re 20 Minutes Away From a Cleaner Fridge, Freezer, and Pantry
If you’re doing the Cure, you know the drill on these sweeps by now: Set a timer and get to work. Normally I’d tell you to grab a basket and start collecting clutter, but kitchen food storage is a different type of beast.
So here’s what I recommend: Bring your trash can close to the refrigerator, grab a grocery bag for food donations (like canned goods), start a 20-minute timer, and clear out the pantry, fridge and freezer one shelf at a time. I like to empty everything off the shelf, clean it while it’s empty, then put everything back—minus whatever’s expired or turned into a science experiment.
Here are what sorts of things to look for in each area:
Fridge
- expired condiments
- rotten produce
- mystery leftovers
- anything really old and unlikely to be used
- anything you have multiples of
- anything you tried and didn’t like
Freezer
- anything freezer burned
- anything really old and unlikely to be used
- anything you have multiples of
- ice trays or frozen tools that aren’t being used (looking at you, KitchenAid ice cream attachment—you don’t have to go in the donation box, but ya can’t stay here)
Pantry
- expired condiments
- expired snacks
- unneeded canned goods
- old, stale food
- anything you have multiples of
- anything you tried and didn’t like
When the timer is up, take out the trash, set aside your donations for a food bank, and enjoy your enviously empty new spaces.
Day 13: Streamline your sentimental clutter.
Sentimental clutter is both the hardest and the easiest clutter to handle.
It’s the hardest because there are feelings involved. Big feelings. And sometimes letting go of objects feels like you’re also letting go of people, memories, or stages of life.
But let me flip the script on sentimental clutter for a moment. Most things you keep because they’re functional. (Even if you use a turkey baster once a year, you still use it.) But sentimental items are things you keep around because of the feelings they inspire. And you can’t relish in those memories (aka your objects can’t demonstrate their value) if those things are tucked in a dusty box in the attic.
Decluttering Tip: Try to establish a penchant for displaying your sentimental items, rather than storing them. You really only need to keep what you can cherish day to day.
It really can be that easy. This whole thing is mental, I promise you. So brace yourself, and get going on today’s mission….
You Can Streamline Your Sentimental Clutter with These 5 Tips
Today, your mission is to sort through some (or all) of your sentimental clutter, and decide what you want to keep. Open up the closets, drag out the boxes, and find your most feelings-rich stuff.
What counts as sentimental? Anything you’re hanging onto not for its usefulness or even its beauty, but just because of what it represents to you.
I chose the words for this assignment—decide what you want to keep—carefully. Unlike when we’re rifling through the kitchen looking for cookie cutters from Christmas ’09, I don’t want you to approach your sentimental clutter searching for things to eliminate. I want you to consider the things you’re storing, and make value-rich decisions on the things that mean the most to you.
Here’s what’s worth keeping, in my opinion:
- Keep things that bring back quality memories. Especially anything you hadn’t thought about in a while. Don’t hang on to things that bring back unwelcome feelings. Notice I say “unwelcome” rather than “sad.” You’ll know an unwelcome feeling when you feel it.
- Keep a few treasured things from a bigger collection. If you have a big collection of, say, mugs or snow globes or birthday cards, a good way to maintain order is to curate your collection, like you’re in a museum. Keep a few of the very best or most memorable, and pass some of the less interesting ones to a new home.
- Keep small capsules from moments of your life. You might decide to dedicate a shoe box each to a stage of your life—childhood, college, your first kid—then fill it with small mementos from each era.
- Keep things that can be made into other, more useful things. Turn ticket stubs into art, or t-shirts into a quilt. Instead of keeping a childhood toy, you could decide to have professional portraits or illustrations done to remember it by. Even just taking an old photograph and using it as a bookmark means you’re getting to enjoy it 10 times more than when it’s stuffed in a box in the attic.
- Keep things you want to keep. You don’t have to be the keeper of your family’s mementos unless it’s something you personally value.
Once you’ve picked through a decent share of your mementos and found many things you love, step back for a moment. If you only kept those things, how would that feel? Could you let the rest go?
More importantly: How do you feel? Was sorting through the things a touching trip down memory lane? If you’ve got space to store it, keep some or all of it and don’t apologize. But if you were feeling distressed or remorseful about the things you’ve decided to hang on to, or the manner in which they were being stored, you’re a great candidate to let it go. Make room for the things you’ve decided to keep so far, and send the rest of it on to another home.
Day 14: Identify a problem area, and set a plan to attack it.
Small and frequent tidying-up sessions will go a long way towards keeping your home in a state of controlled and clutter-free calm. But simplifying your relationship to clutter is about more than knick-knacks and old t-shirts. Because most everyone has a “monster zone” at home that’s absolutely stuffed full of possessions you’re unconsciously hanging on to.
I can’t tell you what that space is in your home, but it should be somewhat obvious. It might be a closet, or your attic, or the basement, or a space under your bed. If nothing is obvious, or you have many and need help narrowing down a target, I like to apply the gadget box test: Say you opened up a brand new gadget—like headphones or a stick blender—and wanted to store the box it came in, just in case you needed to return it or something… where would you put it? That spot is your clutter monster.
And today, we begin to slay the beast…
This Is the First Step to Decluttering a Really Big Mess
Identify your “monster zone” problem storage area at home. You can employ the gadget box test, or just your instincts. The most important thing is that you’re psyched to finally tackle this space.
Decluttering Tip: The “gadget box” test can help you identify problem storage areas: If you wanted to save the box your new gadget came in, where would you put it?
Once you know where your monster zone is… no, I don’t want you to declutter the whole thing today. It’s a literal beast. And in my experience, the best way to tackle big messes like this is doing it a little at a time. So today, remove three things from the space. Just three! Open a box, dig into a drawer—do whatever you need. Find three items (big or small) that you don’t really need anymore, and send them on to their next life via the “sell” and “donate” boxes we set up on day one, or even just the trash or recycling bin.
Wasn’t that fairly painless? You can take just three things away and feel like you’re making progress. It’s like chipping away at marble to reveal a statue.
Decluttering Tip: You don’t have to begin a capital-p Project to discard an item or two. When you come across something you don’t need—get rid of it.
With that confidence and clarity, the second part of today’s assignment is to make a plan to remove one thing each day from this space and declutter it—or three things, or five things, whatever feels like a good pace. And to keep yourself committed, set an alarm or reminder on your phone to do this every day for a month, or once a week until it’s finished. You get to decide what plan is right for you—all I need from you today is the dedication.
Day 15: Do a timed 20-minute declutter in your bedroom.
If your bedroom has become your favorite place at home, you’re not alone. It’s a sanctuary within a sanctuary. The place where you rest and recharge to meet the challenge and opportunity of another day.
So it follows that the bedroom (or “the area of the apartment where sleeping happens”) should be the calmest, most peaceful place to be. But that’s not often the case. Bedrooms always seem to collect quite the collection of everyday detritus: drinking glasses, books, not-quite-ready-for-the-wash wardrobe staples.
Decluttering Tip: Everyone needs a “clothes chair.” If you don’t have room for a chair, some hooks or a rack on the wall can help you avoid clothes piles taking over your bedroom.
If your bedroom isn’t the peaceful haven you need it to be, don’t get in over your head. Take on one quick, timed 20-minute cleanup, and see how much of a dent you can make in a short time.
Let’s get started…
You Can Have a Tidier, More Peaceful Bedroom in 20 Minutes
We’ve done this a few times now, so you know what to do: Set a 20-minute timer and do as much as you can to get errant effects out of the bedroom before the clock runs out. It’s like your own little game show, and the prize is a less-cluttered bedroom.
Where to Look:
- side tables and nightstands
- nightstand drawers
- the dresser top and other surfaces
- consoles and armoires
- closets and drawers where you keep linens or other non-clothing
- hooks and storage racks
- vanity tables
- open shelves
- under the bed
- on and inside a storage ottoman or bench
- the purgatory clothes chair
What to look for:
- Books and magazines
- Drinking glasses and mugs
- Remote controls
- Electronics
- Phone chargers and cords that aren’t being used
- Random objects and decor
- Dingy or very old sheets and linens
- Clothing tags and other trash
- Hangers or sleeves to take back to the dry cleaners
- Safety pins and bobby pins
- Out-of-place grooming supplies or makeup
- Jewelry out of its place
- Clothes piled and draped where they shouldn’t be
- Socks—so many socks
- Shoes, handbags and accessories where they don’t belong
When time is up, stop decluttering. Everything you picked up during your 20-minute declutter should be taken out of the room and either returned to where it belongs, or sorted out of the house (into the trash or into your “sell” and “donate” boxes).
Day 17: Get your sofa into shape. (January Cure)
Spend a little time loving on your favorite seat at home. For most people, that’s probably their main sofa, but you can focus on a chair or any other perch.
Take the throw blanket and pillows off the sofa; give them a spin in the washing machine if you can (and they’re machine-safe).
Remove all the couch cushions and give the naked sofa underneath a quick vacuum. Then vacuum and fluff each cushion as you toss them all back on. When you return the cushions to the sofa, try to rotate and flip them around to new positions, if they have multiple “good sides” — you want to reveal fresh fabric and also even out the wear.
If you notice any stains as you’re going, treat them tonight. And if you notice any tears or pills or other fabric fixes you can solve right away, take a moment to get them done. If you spot anything that needs a more major repair, you can add it to your future projects list.
Once you’re through with the vacuum-and-flip routine, drop your blankets and throw pillows back into place, giving each pillow a quick fluff.
Day 16: Take a catch-up day.
When it comes to transforming your home on this decluttering journey, I make a point to tell you that the goal is progress, not perfection. That’s true for your efforts, too.
If you missed a Cure assignment because you were busy, that’s OK. If you missed six because you just didn’t feel like doing them, that’s OK, too. If you did one thing so far, that’s fine. If you finished everything until now but you really need a break, that’s good too.
Decluttering Tip: When you’re taking on a big cleaning or decluttering project, schedule a “catch-up” day into your plan to tie up loose ends or give yourself a well-earned break.
Today is a a day all about giving yourself grace, and getting realistic about what you can handle…
There’s no real Decluttering Cure assignment for today. I’ve left today blank for you to fill in with whatever task you’d like some overtime to take on.
Here are a few things you could do:
- Do one of the assignments you missed from earlier in the Decluttering Cure.
- Put your “one-room reset” space back together, if you haven’t already.
- Take on another chunk of your paper clutter or sentimental clutter.
- Use the five questions to declutter your own category of stuff, like toys, cords, electronics, packaging, or samples.
- Or just take a day off, if that’s what your spirit needs most.
You’re working hard to make your home the best it can be, and that’s impressive and impactful in any amount. You’ll get to finishing everything your home needs, little by little.
Day 17: Set up a “junk zone” in one of your rooms.
If you ask me, the kitchen shouldn’t get to have a monopoly on junk drawers. There are just as many objects that wander around in the bedroom, or bathroom, or living room without an organized place to call home. So my official stance is: You should have a junk zone in every room.
The junk drawer is chaos, sure, but you can’t have order without chaos. Even if you’re an organized person—especially if you’re an organized person—there will always be knick-knacks and palm-sized essentials that don’t fit neatly into your home’s natural organization solutions. In order to keep those areas tidy, you need to allow yourself a dedicated space to get wild. A place to toss random things with abandon, so you’ll know exactly where they are later.
So today, I’d like you to establish a brand new junk zone of your own…
I want you to identify the room or space in your home that feels the most like a small-item clutter magnet and outfit that room with its own junk-drawer-type dumping zone.
The junk zone might look a little different depending on what room it’s in, but it will serve the same purpose a junk drawer does. It should be a small, confined container where things with no home can collect for a short or long while. You might try a junk tray in the entryway for collar stays, coins, and stamps. Or a junk bowl in the bedroom for safety pins and matches. Or a junk basket in the living room for small toys and magazines. Or a junk drawer (yep, you can stick to the drawer concept if you’ve got one to spare) in the bathroom for bobby pins and skincare samples.
Decluttering Tip: Junk drawers are useful organizing tools, but they don’t have to be drawers. Try putting a junk bowl in the bedroom, or a junk basket in the bedroom for clutter instead.
In the future, you can use your dump bowl—or tray or drawer—to help you swiftly clear clutter from the room. When you need to tidy up, anything without a home can go in that spot. And you’ll know exactly where to look for that random thing you knew you ought to keep.
Day 18: Find a home for stuff you store on the floor.
Some universal truths comin’ atcha: Surfaces collect clutter. And the largest surface in your home is the floor. So it’s all too convenient, especially if you live in a small space with a lack of storage options, to use your floor to store some of your things.
This isn’t necessarily a bad thing, though. You should feel great about maximizing every storage opportunity in your home, and sometimes that means that you forgo a book shelf in lieu of some artfully bohemian piles of books stacked in your bedroom (that may or may not double as nightstands).
The problem with floor storage is when it becomes more of a reflex than a rule. Storing things on the floor intentionally? Great. Storing things on the floor because you haven’t thought of a better place to put them? Not great.
Decluttering Tip: Storing things on the floor makes your space look more visually cluttered than it is. Try vertical or wall-mounted storage solutions when you can.
So today, we’ll run through one quick exercise to identify and re-home some of your floor storage…
One Storage Solution Everyone Has at Home—But Maybe Shouldn’t Be Using
Today’s lesson might not apply to you, and that’s OK. But everyone reading this should at least do this first part: Travel throughout your home with your eyes fixed to the ground, taking stock of anything you’re storing—permanently or temporarily—on the floor.
You’re probably going to come across at least one thing or one area where your floor storage situation feels less than intentional. And that’s when today’s challenge really begins: Let’s find a new home for that stuff—or at least put it back in a more deliberate way.
Clear everything out of the area, setting your stuff aside in another room or area. You’re likely to uncover some dirt and grime under or around the stuff you’re picking up, so now is a great time to spot-clean the floors in this space, too.
When you’re done clearing and cleaning, re-assess your pile of stuff. Try and figure out if there’s a new place or way you can store it:
- If you come across any trash or recycling, toss it.
- If you come across anything you’d like to get out of your home for good, place it in the “sell,” “donate,” or “maybe” boxes from day one.
- If there’s anything that’s better stored in another area of your home, make room for it there.
- With everything else, look for inspiration on how to organize that item better, in the same location. You might be able to maximize your floor space and visually reduce clutter with vertical or wall-mounted storage solutions.
Ultimately, it’s fine if you need to leave things stacked on the floor at the end of this exercise. But now you have the confidence that it’s the best storage method for your home, and not a careless habit.
Day 19: Try the “box and banish” method with your “maybe” items.
Making decisions is the hardest part of decluttering. So if you want to make decluttering easier, well… that the decision-making out of it. At least for the on-the-fence-stuff.
I’m a big fan of the “box and banish” decluttering method. Here’s how it works, generally: Leave a box somewhere out of the way, like in the bottom of your closet or under your desk. Then as you’re living your life, and you come across something that makes you think “do I even really need this?” you just put it in the box. No pressure to get rid of it right now—just put it in the box. (If you end up needing the thing later, you can just grab it from the box.) Eventually, after some time, the box will fill up and that’s your cue to… get rid of everything inside it. Yes, everything.
Decluttering Tip: Have a “decluttering box” in your closet or home at all times, so you can get things you don’t need out of the way as you come across them.
The box-and-banish is a great way to practice living with less. You survived however many weeks or months without needing that dress or that book. So send it off to another home.
You might be thinking, “Hmm I should try this sometime!” Well, I have good news: You’ve been working on this for the past 18 days…
If You Have a Hard Time Letting Go of Clutter, Try the “Box and Banish” Method
Remember those three boxes we set up on day one? We’ll deal with the sell and donate boxes tomorrow. But today, grab that box of “maybes” and… close it up.
The maybe box is a little bit of a crutch. A purgatory that lets you get things out of the way of daily life so you can get a taste of what life is like without it. Give it one more look—grab some things back out of it if you want to. But then close it up and set it back down next to your sell and donate boxes—so we can get everything out of the place tomorrow!
Day 20: Sell or donate the things you decluttered.
I know you’ve been looking forward to today. Or maybe you’ve been dreading it? It’s the day when, after toiling over closets and drawers and storage bins, you have to actually get everything out of your home.
Decluttering Tip: It’s tempting to toss everything you decluttered into the trash, but there are people out there that would love to give your stuff a second life.
Here’s What You Can Do With Everything You Decluttered—And Maybe Even Make Some Money
Grab those “sell” and “donate” boxes and make a plan to get it all out of your home.
For the things you want to donate:
Your donation pile is likely a mixed bag of goodies. If you’re craving some instant gratification for getting these things out of the house, take the whole box to a place like Goodwill and let them sort it out. Or if you have a lot of clothes, specifically, you can opt to mail them to For Days, a recycled-material clothing company, in a Take Back Bag. The bag costs $10, but you can fill it to the brim with your clean, used clothes and For Days will make sure they don’t end up in a landfill.
If you have the energy to do a little sorting yourself, however, there are plenty of specialized charities that will take certain items off your hands and give them deserving new homes. Just check out 10 Charities That Will Give Your Old Things New Life.
You can also donate your stuff to individuals in your community, by just posting them as free items on Facebook Marketplace, Nextdoor, Freecycle, or other local neighborhood groups. It can be really time consuming to coordinate meeting several people, so if you feel comfortable and the weather is cooperating, just leave your “free to a good home!” stuff outside your residence. Make a post detailing what’s out there, how much it costs (all free!), and how long you’ll leave the items outside (until sundown?). And don’t forget to take your posting down when the stuff is gone or you pull it back inside.
The things you want to sell: For all of the things that you know have some value and it’s worth your time to sell them, you have a few options.
If there’s not much in the box, or if a few things stand out to you, you can post individual listings on local sites like Craigslist, Apartment Therapy Bazaar, Facebook Marketplace, LetGo, or OfferUp to connect with individual buyers directly. My go-to is actually a Facebook group that was set up as a buy-and-sell platform for my specific neighborhood; I like that buyers are people in my community and I find that’s it’s fast and easy to coordinate pick-up when the buyer lives close by. If that interests you, you can ask your neighbors about it, or search your neighborhood’s name on Facebook.
Local consignment and thrift stores are great for when you have a lot of one type of thing to sell. If you have a box of clothes in good shape, for instance, you can search online for a local consignment clothing boutique that might buy much of it off your hands, or sell it on your behalf (Plato’s Closet and Buffalo Exchange are a couple of American clothing store chains that will buy some of your used clothes.)
If you have a lot of clothes to sell, try ThredUp. You mail them a big bag of clothes and accessories (ThredUp’s “Clean Out Kit”) and they inspect, photograph, list, and ship your items for you. Anything that doesn’t sell can be returned to you for a small fee, or recycled by them.
If you’re willing to do the photography and listing yourself, Poshmark is a great platform, too, and they make it safe and easy with protection guarantees and easy shipping options. You can sell clothes there as well as home goods.
That’s it for the Decluttering Cure this year! Thanks so much for joining us, and I hope to see you again next year!
