How to Disassemble a Lasko WindMachine Fan to Clean It
Please be sure to have a Phillips head screwdriver available to disassemble the product.
Remove the front cage of the fan:
1. Be sure the product is unplugged then lay the fan face down on a flat stable surface. The rear grill should be facing you.
2. Locate and remove the four screws along the outer edge of the back grill and also the two near the handle.
3. At this point, unscrew the side knobs and remove the body of the fan from the stand. You will also need to remove the handle.
4. Next, separate the grills to expose the fan blade. The front cage is free to be cleaned.
Detach the motor, with or without the fan blade, from the back cage:
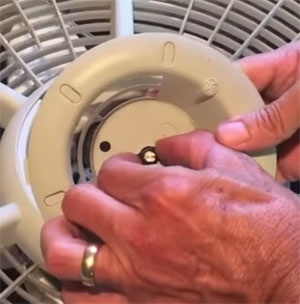
Plastic ring with black electical attachment
5. You can remove the fan blade now if you want. It should just pull straight off. If not (which it never seems to do for me), use a screwdriver or a small pry bar to carefully apply leverage between the blade and the fan housing, while gently rocking the blade. You can leave it attached to the motor and clean it with a cloth while still attached, if not. Just do not get water on the motor. You won't be able to lubricate the fan if you cannot get it off. See below.
6. Flip the fan over so the blade is facing down. Pull the fan control knob off the center front of the fan, then the white ring around it. It should pop out with a wire attached to it.
7. In the center of this white ring is the post the knob is attached to. Around the post are two black pieces that when squeezed together towards the knob, will detach the wire and allow the white ring to be removed from the fan.
8. With the fan side of the motor facing up, remove the two screws holding the motor on. If the blade is still on, you will need to use the hole in the fan blade that is there so you can get a screwdriver down to the screws. Use the hole for one of the screws then turn the fan blade so the hole over the 2nd screw.
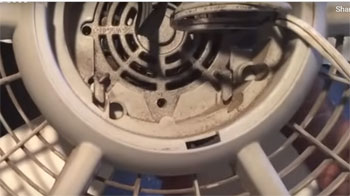
Two metal tabs that slide motor off
9. Flip the fan over so the blades are facing down. There are two metal tabs holding the motor to the case. The motor will slide up and off the case at these two tabs.
Free the Back Cage:
10. Push the electrical cord down to slide the plastic block on the cord away from the case, then turn the cord itself to remove it from the tab holding it in. The plastic block is there so the cord cannot be pulled out of the motor. Now the back cage is free to be cleaned.
Clean, Let Dry & Put Back Together:
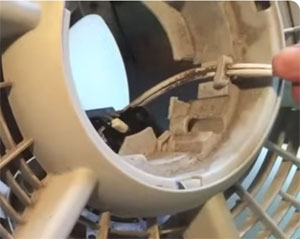
Picture of plastic block used to attach cord
11. Clean all pieces and let dry. Vaccum out the motor.
12. Lubricate the base of the fan blade shaft (the metal post the blade attaches to) with 3-in-One Motor oil,* SAE 20 (blue label) to help extend the life of the fan. (Not the 3-in-One silicone oil, or the one with the black label)
*WD-40 and Liquid Wrench are not the best choices for long-term lubrication of electric motor bearings because they can dry out, become gummy, and attract dust and dirt.
13. Put the fan back together in reverse order.
- With the fan blade shaft facing down and the front of the back cage facing up, pull the electrical cord back through the hole in the center of the back cage so that it is hanging on the outside side of the cage.
- Reattach the electrical cord to the cage.
- Attach the motor by sliding the two tabs back on.
- Holding the motor in place, flip the fan over and replace the 2 screws holding the motor to the case.
- Flip the fan over attach the ring that was removed from around the control knob back to the electrical wires.
- Attach the ring to the case and then the center knob.
- Attach the blade to the fan shaft and confirm they spin freely.
- Put the front cage back on and replace the four screws.
- Put the side knobs and screw the handle back on.
- Plug in and test.
