Home Grown Bean Sprouts
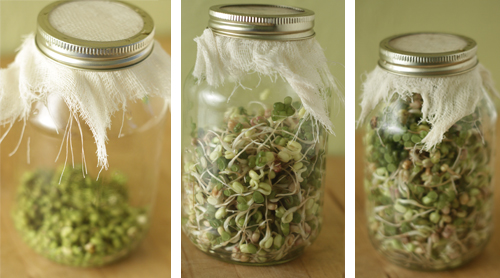
See below for Growing Sprouts
There are many popular ways to serve bean sprouts that you have grown in your own kitchen. They can be tossed into fresh salads, added to sandwiches, sprinkled over omelets, or stirred into a delicious chicken chow mein stir-fry. Prepared with these instructions, you can easily grow, serve and enjoy your very own sprouts with your next healthy meal!
Every sprout has a unique taste, ranging between sweet and bitter. If you are looking for unique flavours, add mung, alfalfa and lentil sprouts to soups, stir-fries, salads, sandwich fillings, meat loaves, even into bread dough. Alfalfa and mustard seed sprouts can be substituted for scallions and celery in chicken and tuna salads
There are three types of spouts – seed, bean and grain.
- Alfalfa, clover, millet, radish and sesame sprouts belong to the seed family, taste sweet and are rich in vitamins C and K, and minerals.
- Bean sprouts are divided into three classes; tender beans, (including green lentils and mung beans) tough beans and the soy family. The soy family includes the soybean along with garden peas and garbanzo (chick) peas. All contain significant amounts of vitamins A, B complex, C and F, calcium, phosphorus, iron and lecithin.
- Barley, oat, rye and wheat sprouts are usually sweet and may be used in baking. All may be dried and ground, are rich in vitamin E and protein. These are the grain sprouts. Sprouted Bread: This delicious cake-like bread has been enjoyed for thousands of years. Sprouting grains and baking at low temperatures allows the wheat to be less mucus-forming and more digestible. This is a better quality bread because it is closer to a living food. Sprouted bread can be bought at your local health food store.
Make sure when you use seeds or beans for sprouting they are good-quality. Health food stores will have an abundance of beans and seeds for sprouting. If you find a problem in sprouting your beans and seeds, they are probably too old. Some beans available in stores have been treated with inhibitors to stop the sprouting process. Do not use seeds that are packaged for gardens because they may be treated.
Here are some examples of the most popular beans and seeds for sprouting.
Seeds
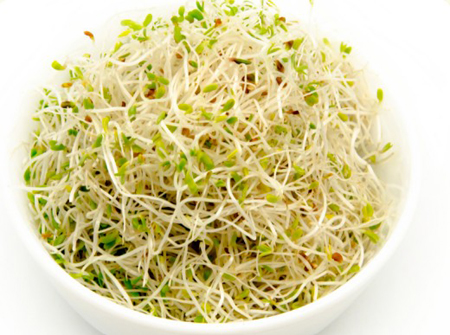
Alfalfa:
Alfalfa sprouts are a very common and popular sprouting variety as they have a mild taste making them great to add to any dish for extra crunch and nutrients. Alfalfa seeds will take three to seven days to sprout and should preferably be eaten raw as the nutrients in the sprouts are unstable and will go lost when cooked. When the root is 1 1/2 inches long, it will begin to develop tiny green leaves. At this stage it needs to be eaten immediately so the plant will not switch to photosynthesis that exhausts the stored food in the seed.
Some believe alfalfa sprouts to be the most nutritious food in the world. They are high in protein, chlorophyll, vitamin A, and vitamin K. They are an excellent source of minerals, calcium, magnesium, and potassium - all crucial for muscle and bone health.
Raw alfalfa is delicious in stuffing pitas, on hamburgers, in sandwiches, salads, etc. It would seem a grievous act to cook these delicate threads of life.
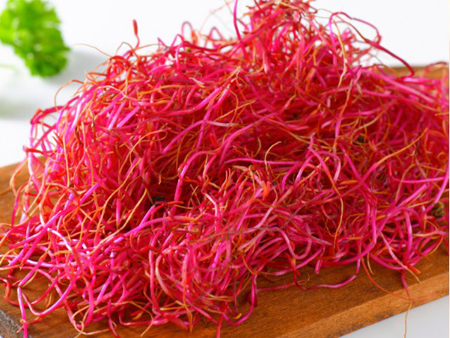
Beet:
Beet sprouts are more challenging to grow and take longer to sprout to edible form, between eleven to twenty-one days from seeds. But they are worth the wait!
They taste slightly earthy and sweet, very much like full-sized beets. Their striking hot pink stems and bright green leaves make any dish eye-catching. Not only do they look gorgeous, but like all sprouts, they add nutrients such as Vit A, B, C, E, and K, and also iron, calcium, and protein.
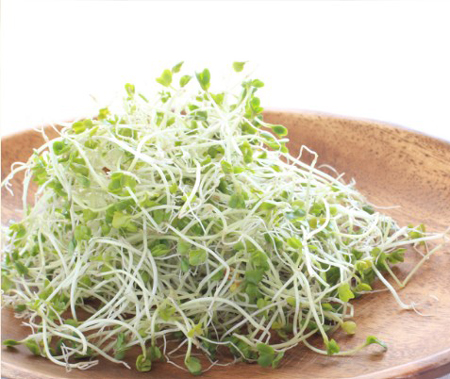
Broccoli:
Broccoli sprouts don't taste like broccoli but add a mildly spicy, nutty flavor to any dish that needs a spicy flavor boost. They also add a beautiful pop of striking green color to your dishes. You can expect edible-sized sprouts from seed after five days. Like alfalfa and other thin sprouts, you should eat them raw to maintain their nutritional structure and value
Broccoli sprouts are sure to increase the nutritional intake of any dish and boost your overall health. They are high in antioxidants and a good source of fiber, folic acid, and vitamins A, C, and K.
Clover:
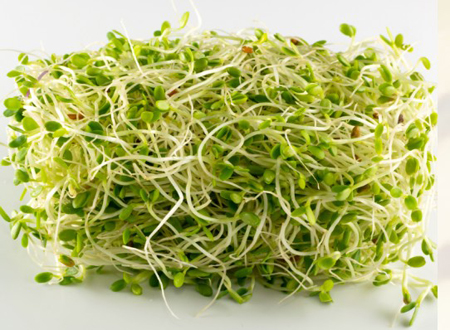
Red clover sprouts come from the legume Trifolium seeds, which look and taste very similar to alfalfa sprouts. Red clover sprouts have a long white, thin stalk with a light green top, providing a mild flavor and crunch.
You can harvest red clover sprouts within five to six days from seeds. Due to their fragility, they should instead be eaten raw than cooked to maintain the nutrient content.
Like many other sprouts, Red clover sprouts are rich in protein, vitamins, iron, and calcium.
Fenugreek:
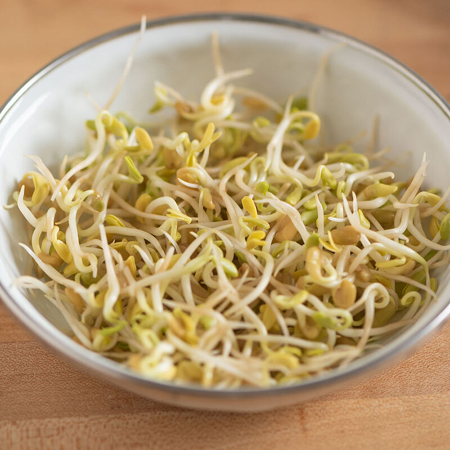
This legume is still used in medicine, food and teas. It is a spicy seed that is excellent for making curry. Use when the sprout has grown to 1 1/2 inches long.
Fenugreek is often sold where the seeds are broken for making fenugreek tea. Make sure you buy whole fenugreek seed.
Kale:
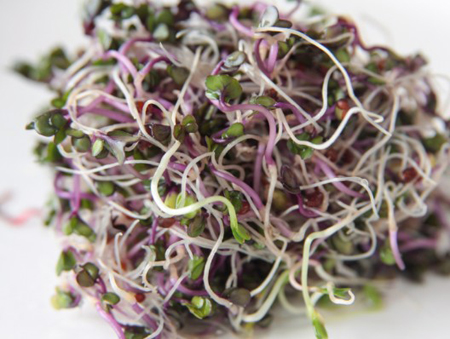
Kale sprouts have a unique shape with grey-green and violet purple-toned veins. They provide a crisp texture with a sweet flavor and undertones of nuts, pepper, and classic brassica bite. You can harvest kale sprouts from day three to six, depending on how long you want them to grow.
Kale sprouts are a good source of vitamin C, folic acid, calcium, and potassium and can be enjoyed both raw or cooked by lightly sauteeing them.
Mustard:
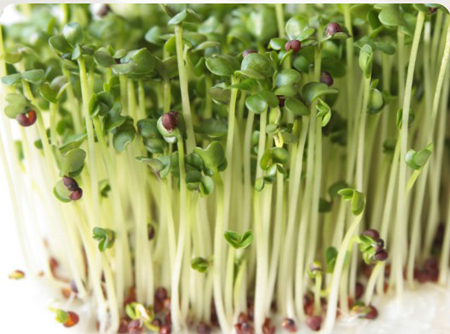
Mustard sprouts look very similar to alfalfa sprouts and have a spicy, earthy flavor. Some compare them to the taste of horseradish. They work great to add a bit of spiciness to sprout blends or eat on their own if you choose. Mustard sprouts are ready to harvest in three to six days, and the longer the sprouts mature, the more intense the flavor will become.
Expect a nutritional boost of vitamins and minerals, including calcium, iron, zinc, magnesium, and selenium, when you add them to salads and sandwiches.
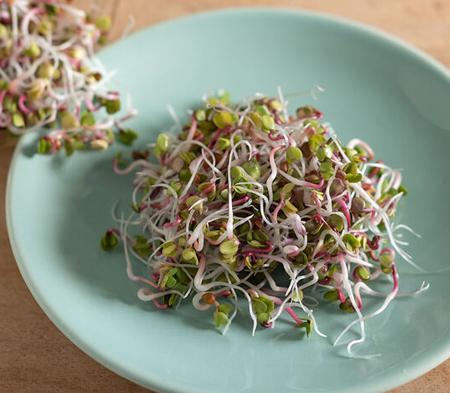
Radish:
Radish sprouts come in just as many diverse varieties and taste similar to mature radishes but are less spicy. Their slender white and red stems look stunning as a garnish on salads, sandwiches, sushi, or tofu scramble.
Radish sprouts are rich in vitamin B and C, folate, and manganese and will sprout within three to six days from seeds.
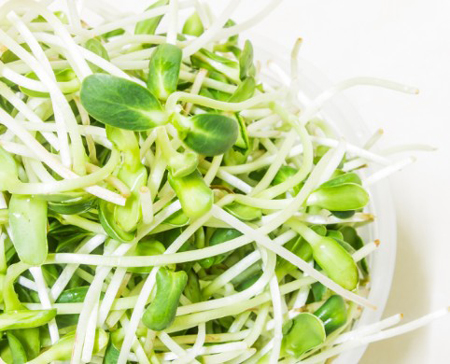
Sunflower Seeds:
Sunflower sprouts are another interesting sprout to add to dishes with their nutty flavor, more prominent size, and crunchier and crispier texture. Sunflower sprouts will take longer to grow due to their size, and you will be able to harvest them within twelve to fourteen days.
They are loaded with vitamin D, calcium, and iron. Just be cautious, as sunflower sprouts are more calorie-dense and high in fat (although mostly healthy unsaturated fat.)
Beans & Other Legumes
Grocery Store Legumes: You can sprout dried legumes (beans, lentils, peas) bought in bags from the grocery store. They are inexpensive and, if not treated with heat or chemicals, will germinate, particularly if you choose organic options to ensure viability. Simply soak them, rinse daily, and they will sprout in 2–3 days. Yes, many grocery store dried legumes are heat-treated, but usually only to a low temperature to stabilize them for storage, not to cook them. While this process kills pests, bacteria, and mold, it does not always render them incapable of sprouting.
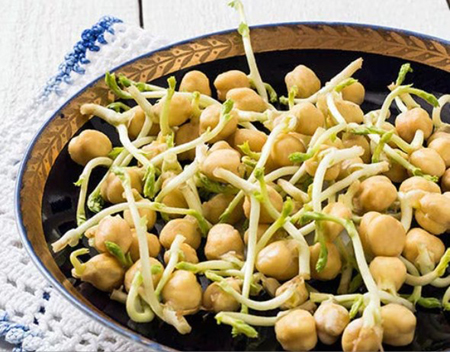
Chickpeas:
Commonly known as garbanzo beans. Primarily a pulse crop grown in India. The sprout is tender and delicious and is ready to eat when the root is between 1 1/2 and 2 inches long.
Beans such as chickpeas are sometimes difficult to digest, and sprouting helps to improve digestion. They are also more protein-rich than other sprouts and are packed with many nutrients such as Vitamin C and iron.
Since chickpeas are larger, they need to be soaked for longer and require more frequent rinsing and draining. Chickpeas are one of the quickest beans to sprout; they will sprout in two days. Enjoy them raw in salads or cooked in soups and veggie burgers, or make delicious raw hummus. Cooking requires only 5 minutes.
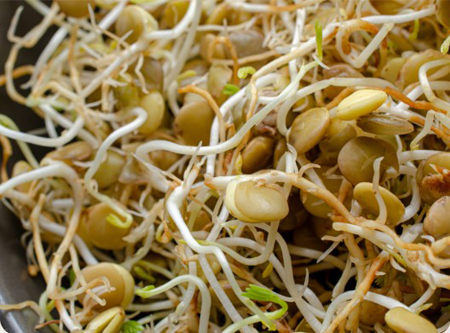
Lentils:
Of all the sprouts, lentils contain the most protein, and they are very low in calories, making them fantastic for any diet or weight loss program. Lentils will add great crunch and a rich, nutty flavor to any dish. Remember that split lentils won't sprout; you must purchase whole lentils.
When lentils are sprouted, they become sweeter with a delicate flavor. They need only 5 minutes of cooking compared to 30 minutes for dried lentils. But we love them raw! Lentil sprouts are ready to be eaten when the root is 1 inch long.
Not only are they rich in nutrients such as thiamine, copper, manganese, iron, and vitamin C, but they also look pretty with their various colors. Lentil sprouts can be enjoyed two to four days after sprouting, depending on how you like them. They can be eaten raw or lightly cooked to soften them a bit.
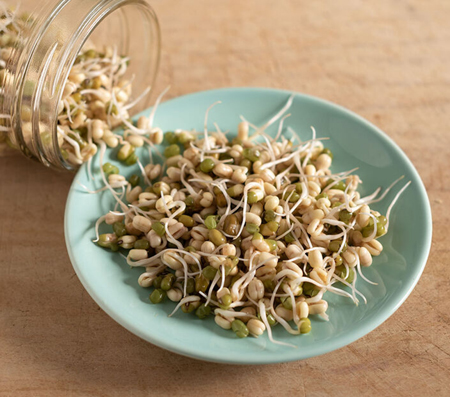
Mung Beans:
Another popular sprout is Mung bean sprouts and are the easiest to sprout for beginners. Mung bean sprouts are common in Chinese restaurants and grocery stores. They originated in Asia and have become widely used in Asian and Western diets. They have a delightful fresh raw flavor.
Mung beans are high in protein and fiber, low in calories, and rich in vitamin C, calcium, and iron. With their mildly nutty flavor and bigger size, they go well in cooked dishes such as stir-fry or eaten raw in salads. Mung bean sprouts take three to four days to grow to an edible size and typically have two to four-inch long white stalks.
When the bright white root grows from 1 1/2 to 2 inches long, they are ready to eat. Cook no more than 3 minutes.
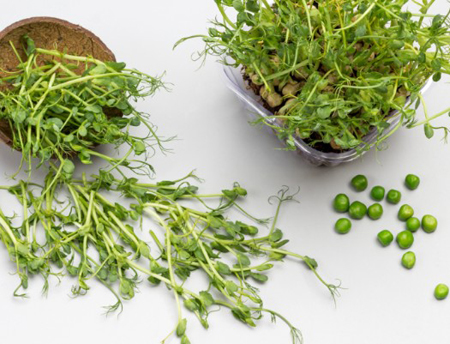
Peas:
Sprouting peas increase their sugar content, giving pea sprouts a sweet vegetable flavor. Wrinkled or smooth varieties work equally well. When root is 2 inches long, they are ready to eat raw, or need only 5 minutes for cooking.
Green peas grow tasty, refreshing sprouts and have a sweet, mild flavor that adds crunch to salads or sandwiches. They are packed with Vitamin A, B, and C and minerals such as calcium, iron, and phosphorous.
Green pea sprouts are larger than broccoli and alfalfa sprouts and take about the same time as mung bean sprouts to grow. You can harvest sprouted green peas within two to three days. Due to their size, green peas need to soak longer and require more frequent rinsing and draining.
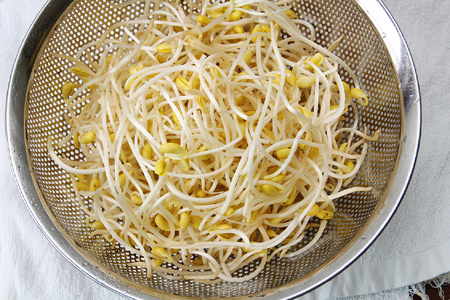
Soy Beans:
These are the most nutritious of all sprouts and are commonly used in China. The small soy bean that is yellow in color is excellent for sprouting. Soya beans are considered fairly difficult for the inexperienced sportiest because they are prone to fermentation, especially during the warm weather. To overcome this problem, rinse sprouts often and remove discolored and unsprouted seeds. They are ready to eat when the root is 2 inches long. Soya bean sprouts require approximately 10 minutes for cooking. These sprouts are higher in protein than any other bean.
Various Legumes: Other legumes that can be sprouted successfully are lima, maro, pinto, kidney, harlot, navy, aduki and broad beans. You can also sprout black-eyed, cowgram, pidgeon and redgram peas. Some of these may be difficult to find but are fast becoming more available.
Grains
Barley:
Barley converts the largest amount of starch to sugar which is why it is widely used in producing beer. It has therefore been studied more thoroughly than any other seed. Again as with many grains, the roots should be no longer than the seed size itself.
Pearl barley has been processed to remove the outer hull and some of the bran so the germ (the little bit that makes a plant sprout) is often damaged so it won’t sprout.
Corn:
Finding corn for sprouting is a real trick because the germ is rarely intact because of how the kernels are removed from the cob. The root should be allowed to grow for only 1 inch in length. Cooking time is approximately 8 minutes.
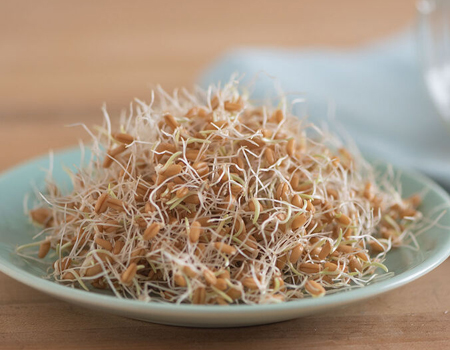
Wheat:
A light delicious flavor resembling fresh, picked corn. The sprouts should not be longer than inch or less. Grain sprouts grow faster than legumes and refrigerating them does not seem to slow them down.
Do not confuse wheat grass and wheat sprouts. As wheat sprouts become wheat grass, they take on completely different nutritional properties. Wheat sprouts cook within 8 minutes or less. Wheat can be bought in health food stores.
Growing Sprouts
Buying Seeds and Beans
Look for raw seeds that have not been chemically treated for planting in the ground. Avoid toasted or roasted seeds or grains; they will not sprout. Avoid cracked or milled seeds. Look for the word 'sproutable' on the label or package. Many companies package seeds and beans specifically for sprouting.
Disinfecting Seed
Although disinfecting seed is not necessary for sprouting, some people recommend disinfecting your seeds prior to sprouting, because if not properly disinfected, all seeds have the possibility of carrying foodborne pathogens. To disinfect, soak the seeds or beans in a 2% bleach solution - 1 tsp. bleach to 1 cup very warm tap water. Rinse thoroughly. To reduce the risk of contamination it is recommended that sprouts are grown in clean, sanitized containers away from areas of other food preparation and pets.
Mixing Seeds to Sprout
Mix sprouting seeds by combining varieties with similar soaking times and growth rates, such as mixing brassicas (broccoli, kale, radish) or combining 25% each of mung beans, lentils, wheat, and sunflower seeds for a varied blend. See Chart below for soaking and germination time.
Split lentils will not sprout.
Mucilaginous Seeds: Seeds like Chia, Flax, or Cress are mucilaginous (get gelatinous) and should only be mixed in small amounts with alfalfa or clover to avoid mold.
- Combine Similar Varieties: Group seeds that take roughly the same time to sprout (e.g., alfalfa, clover, radish, and broccoli all take about 5 days).
- Create Balanced Flavors: Mix mild seeds (alfalfa) with spicy ones (radish) or crunchy ones (lentils, mung beans).
- Common Seed Types to Mix: Leafy/Mild: Alfalfa, Clover, Radish, Broccoli, Kale, Kohlrabi.
- Combine small, leafy sprouts (alfalfa/clover) with large, crunchy ones (radish/lentils).
- Proportions: If mixing, try a blend of 25% Mung Beans, 25% Wheat, 25% Lentils, and 25% Sunflower seeds for a varied texture.
- Legumes/Beans: Mung, Lentil, Adzuki, Chickpea.
- Crunchy/Salad Mix: Lentils, Adzuki beans, Mung beans.
- Mild Mix: Alfalfa, Broccoli, Clover.
- Spicy Mix: Radish, Broccoli, Alfalfa.
- Salad Mix: Alfalfa, Radish, Broccoli, and Clover
- Antioxidant Mix: Broccoli, Clover, Alfalfa
Mixing seeds for sprouting involves combining seeds with similar germination times—like alfalfa, broccoli, and radish—to create balanced blends. Use 1–2 tablespoons of seeds, soak for 8–12 hours, and rinse 2–3 times daily. Popular mixes include mild salad blends or high-protein combos like lentils, mung beans, and adzuki beans.
Containers for growing sprouts
Jar or Bottle Method.
- Use a bottle or jar with a wide mouth. Cover the mouth with cheesecloth or a thin wire screen, fastening securely with string, rubber band, or Mason jar ring.
- Place cleaned seeds at the bottom. Cover the seeds with warm water to soak for 6 –12 hours (see chart below) , then drain.
- Once the initial soaking is over, Rinse them with water 2–3 times a day. Each time the sprouts are rinsed, invert the jar for a few minutes and drain completely. Place the jar on its side and turn the jar to spread the seeds out for good air circulation. If jar is glass, store in cupboard out of sun or direct light.
- Sprouts should only be exposed to sunlight during the last 1–2 days of growth, specifically to indirect light, to initiate "greening" and increase chlorophyll, develop nutrients and color before harvesting. Avoid direct, harsh sunlight as it can make the sprouts too large or create a bitter taste.
- Remove the sprouts from the jar and rinse them in a water-filled bowl to let the seed hulls come off and rise to the top. Drain and they are ready to use.
- Or to store them in the fridge, let them air dry on a dishcloth or paper towel. Proper drying will stop their growth and slow down spoilage. Store them in the fridge in a container lined with a paper towel. The sprouts will keep fresh for at least a week.
Colander Method. An interesting way to grow sprouts is to place the cleaned and rinsed seeds on several layers of damped paper towels, cheese cloth, or muslin that have been placed in a colander or a perforated plastic tray. This is useful for larger seeds. Place rinsed beans in the colander and set in large bowl. Fill with water to soak. Once the initial soaking is over, drain well and cover the beans with damp towels to keep them moist..
Begin with a Good Soaking
First, select only whole and clean seeds. Wash the seeds in lukewarm water if they are soiled. Next, it's time to prepare them by soaking them for 8 - 12 hours in warm water. You can expect the bean seeds to swell up quite a bit during the soaking process. Never use cold water, as it will chill the seed and they will not grow as quickly as you would like. After soaking, remove any seeds that have floated, that have cracked hulls, or that haven’t swelled up. These are sterile and will rot. After soaking, rinse and drain the seeds thoroughly.
Amount: You won't need too many seeds to make a meal; typically a quarter cup of seeds will make about 2 cups of sprouts. 2- to 3- tablespoons of seeds may be plenty for personal sized meals. Keep in mind that sprouting increases the seed volume 6 to 8 times. Do not grow too many in a container; they need plenty of air circulation.
Great on Sandwiches & Salads
Alfalfa sprouts - 2 Tbsp. in a one quart jar, yield 2 cupsChoice for Chinese Dishes
Mung bean - 1/4 cup dried beans in a one quart jar, yield 2 cups
Variety Dry Measure Yield Soaking time Sprouting time Seed Viability
Beans/ Legumes Lentils 1/2 Cup 2 Cups 12 hrs 3 days 3 - 5 years Chickpeas / Garbanzo 1/2 Cup 2 Cups 12 hrs 3 days 2 - 3 years Adzuki 1/2 Cup 4 Cups 12 hrs 4 days 3 - 4 years Mung 1/2 Cup 4 Cups 12 hrs 3 days 1 - 3 years Lima/ Pinto/ White/ Red 1/2 Cup 2 Cups 12 hrs 3 days 3 - 5 years Green peas 1/2 Cup 1 1/2 C 12 hrs 3 days 3 - 4 years Small Vegetables Alfalfa 3 Tbsp 4 Cups 6 hrs 5 days 4 - 5 years Cabbage 3 Tbsp 4 Cups 6 hrs 5 days 3 - 5 years Clover 3 Tbsp 4 Cups 6 hrs 5 days 2 - 5 years Kale 3 Tbsp 4 Cups 6 hrs 5 days 4 - 6 years Mustard 3 Tbsp 4 Cups 6 hrs 5 days 4 - 6 years Radish 3 Tbsp 4 Cups 6 hrs 5 days 4 - 6 years Turnip 3 Tbsp 4 Cups 6 hrs 4 days 4 - 5 years Fenugreek 1/4 Cup 4 Cups 6-12 hrs 5 days 4 - 5 years
Grow out of direct sunlight
Sprouts grow fastest in warm temperatures, free from drafts and away from direct heat. In cold weather, soaking times may be increased a few hours and the sprouts can be rinsed in slightly warmer water. Between 75-and-85 degrees Fahrenheit is the ideal sprouting temperature. Do not place the beans or seeds in direct sunlight for their initial growth period.
Air must be allowed to circulate in the sprouting container. There should always be about one-third of the sprouter left empty for air circulation. Remember that sprouts expand, and provide plenty of growing room for them.
Final Growth in Light
Sprouts do not have to grow in darkness as they would in soil. Some introduce sunlight during the latter period of sprouting, allowing the sprouts to produce chlorophyll and vitamin C. This will compromise vitamin B2, a fair trade for chlorophyll. When sprouts have grown to size, they can be kept in a refrigerator, but will continue to grow. Once they are ready, they should be eaten as soon as possible.
Cleaning and Storing Sprouts
While sprouting, the hulls will loosen from the sprout. Although the hulls are editable, once the seeds or beans have sprouted you may want to remove them. Empty your sprouts into a large bowl and fill it with cool water. Gently pull the sprouts apart and swish the sprouts around with your hand for about 20 seconds. Loose hulls will float to the top and can be skimmed or poured off. Drain the sprouts thoroughly and let them sit 6 - 8 hours before refrigerating to make sure they are dry to the touch. If the sprouts are wet, they will rot quickly.
Refrigerate: How long can sprouts be stored in the refrigerator? After your sprouts are the desired length, they should be placed in the refrigerator 6-8 hours after your last rinse. The cooler temperature will slow their growth process, so they remain at your favorite harvest size for a longer period. It is best to eat them within one week for optimum freshness. After that first week they will start to decline and lose nutrients and flavor. You’ll need to rinse and dry your sprouts each day of storage.
Freeze: Sprouts can be frozen, but they will not be as crisp as you may like them for a salad. For the best nutritional value, they should be eaten without cooking them. If you're going to cook them, however, it won't make any difference. Frozen sprouts are a good addition to soups and breads. If you find that larger sprouts are less tender than you may care for, simply blanch them in steam or boiling water for a minute or two.
Dried: Sprouts can also be dried in a very low temperature oven. After drying, they can be ground in a blender or food processor for use as a thickener when needed for soups and gravies. Ground sprouts can also be used to top off casseroles and added to bread dough for extra nutrition.
