Cherry Jam
from https://tinandthyme.uk/
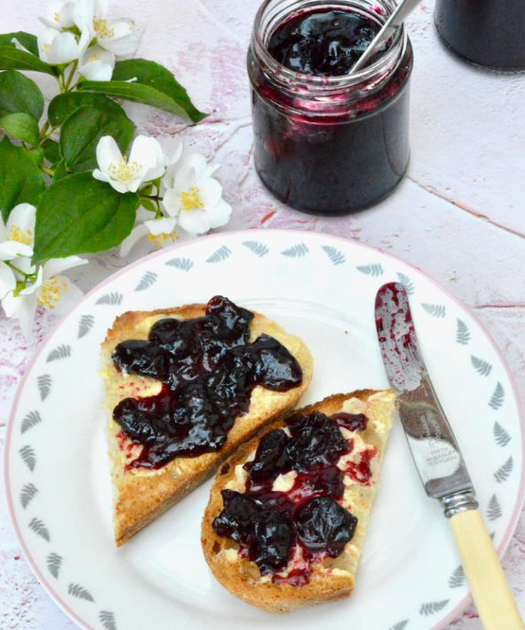
Homemade cherry jam is one of summer’s delights. It’s easy to make, delicious and makes the most of in season cherries. This recipe uses the cherry pits for added flavour, but you can omit this step if you prefer. Spread it on toast for breakfast or enjoy with scones and cream for afternoon tea.
You can make jam with any type of cherry. I’ve made the one you can see here with sweet black cherries. I use less sugar in my cherry jam than most of the recipes you’ll find. After all, cherries are plenty sweet enough and less sugar is not only healthier, but it allows the flavour of the fruit to shine through. It’s absolutely fine to use sour cherries though. In fact sour cherries make an even more delicious jam as they have a high acid content. They’re also softer skinned, so lose their shape and become more jammy when cooked. Don’t worry about the sugar quantities if you use sour cherries though, you’ll just end up with a slightly tangier jam.
Whilst sour cherries contain a moderate amount of pectin, sweet cherries don’t have a great deal. This is easily sorted, however, by adding lemon. Lemon is a great source of natural pectin. Its tartness also balances out the sweetness of the cherries and sugar. I use the whole lemon as well as the cherry pits. The lemon peel, pith and pips contain the highest amount of pectin, so it makes sense to use them. As for the cherry stones, they contain the seeds which are full of flavour – a mix of cherry and almond. Once I’ve squeezed out the juice from the lemon, I place the remains in a muslin bag along with the cherry pits and cook it with the cherries. I then hoik the bag out before the final jamming stage.
Note: Cherry pits and the inner nuts they contain are a potential source of cyanide. When you chew them they release a chemical called amygdalin, which your body converts into cyanide. Cooking the pits, however, deactivates the amygdalin and renders them safe to consume.
Top Tips
- For an additional flavour boost add a tablespoon of cherry brandy to the jam. Stir it in just before you pot it up.
- Beware of jam sugar, it has added pectin. You don’t need it for this recipe and you’ll likely end up with a very tough jam if you use it.
- Instead of serving cheese with chutney, why not try it with cherry jam instead? The sweet and salty notes complement each other. Soft cheeses with a pronounced flavour work particularly well. Go for ripe brie, camembert, creamy goat’s cheese, gorgonzola and similar.
Cherry Jam Recipe
600 g fresh cherries whole weight, ie not yet pitted
1 lemon
360 g granulated sugar can use preserving sugar instead, but NOT jam sugar (I use golden granulated sugar)
Place two saucers or small plates in the freezer. You'll need these later for testing if the jam has set. Wash your jars and place in the oven to sterilise. For details check this post how to sterilise glass jars and bottles.
Wash the cherries, transfer to a colander to drain, then remove the stems and pits (stones). Halve the cherries, then place in a large heavy bottomed pan or preserving pan. If you don’t have a cherry pitter, halve the cherries first, then remove the pits. Don’t throw those pits away though.
Squeeze the lemon juice over the cherries, but retain the skin and pips.
Tie the cherry pits, lemon skin and pips up in a square of muslin or use a muslin bag. Add this to the cherry pan.
Over a medium heat, bring the cherries to a low simmer. With a lid on, cook for ten minutes or until the cherries are soft.
Fish out the muslin bag with a fork and squeeze it against the side of the pan to extract as much of the juice as possible.
Add the sugar to the pan and stir until it’s dissolved.
On a medium-high heat, bring the pan to a rolling boil. Boil until setting point is reached. This usually takes about ten minutes. Start to test after eight minutes though.
To test, remove the pan from the heat so it doesn’t overset. Place a teaspoon of jam on one of the cold saucers. Leave it for thirty seconds or so, then push your finger slowly through it. If it wrinkles, it’s set. If it remains runny with no wrinkles, continue boiling until you get there. Alternatively, use a thermometer and boil until it reaches 105℃/220°F.
Once the jam has reached setting point, give it a good stir, then ladle into warm sterilised jars. A jam funnel makes this job a lot easier. Cap immediately with clean sterilised lids and twist tight.
Leave to cool then label with the date and type of jam. Store in a cool dark place for up to a year, though it's generally nicer when consumed in the first six months.
Three 250 ml jars
