Ways to Decorate Cookies
I. Cookie Decorating BEFORE Baking the Cookie Dough
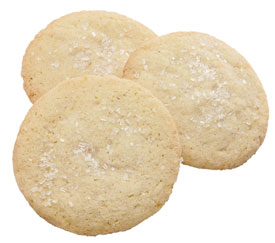
Sugar
The most basic way to finish a cookie is with sugar, which gives it a sweetened coating and a crunch, depending on the type used. Large grained sugar, called “coarse grained” sanding sugar, is applied before baking to Christmas and other sugar cookies. Granulated sugar is sprinkled on cookies such as Pennsylvania Dutch Sugar Cookies and Molasses Cookies to give them a sparkle. (Cookies that are coated in powdered or granulated sugar are usually rolled right after baking while still warm to help the sugar adhere.)
Additional flavor can be added to a simple cookie by rolling in flavored sugar; for instance, Snickerdoodles are rolled in cinnamon sugar. You can even color sugar or buy colored sugar. To help the sugar stick before baking, you can brush each cookie with beaten egg white with a pastry brush, top with a light coating of sugar and bake.
Old Fashioned Molasses
Cookies
Soft Sour Cream Cookies (Sugar Cookies)
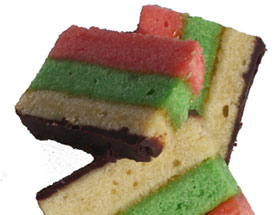
Color
Color Dough: To add color to cookies, you can color cookie dough with food coloring, as is often done with Spritz Cookies and Neapolitan Cookies (Venetians) cookies. You could even color just a little of the cookie dough and pipe it onto cut out cookies. However, after baking, your coloring will not be as intense after it is baked.
Colored Sugars and Candy Jimmies: Another way to add color is to sprinkle unbaked cookies with colored sugar as mentioned above. Other products available are colored jimmiesSusan sprinkles her French Buttercream Cookies with colored sugars for Christmas.
Colored Candies: Holiday colored themed M&Ms are often used in place of chocolate chips in Chocolate Chip Cookies to add a festive color.
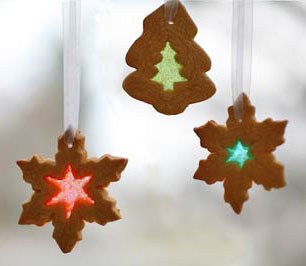
Stained Glass Cookies
Cut rolled cookie dough into desired shapes about 1/4" thick. Cut out a design in the cookie with a cookie cutter or the tip of a sharp knife, leaving a border of about 1/2" or a little more. Place cookies on foil lined cookie sheets and carefully spoon ground hard candies into the spaces, filling to same thickness as the cookie. Bake until candy is melted and cookies are slightly browned. Slide foil with cookies to wire cake rack to cool thoroughly before removing.
Recipe for Stained Glass Cookies
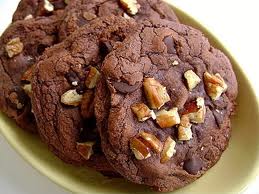
Fruit, Nuts and Candy
Press a whole or chopped nuts or half of a candied cherry into the cookie before baking, adding flavor as well as a nice festive color. Sprinkle with sesame seeds, sliced almonds - the possibilities are endless. Macaroons and Spritz cookies are often finished this way.
Candies are also very decorative. I like to add one or two small cinnamon candies to my Spritz cookies, adding, not only a decorative finish, but another flavor element as well. Hershey's kisses and peanut butter cups have been used to decorate cookies
Soft Sour Cream Cookies (Sugar Cookies) - has raisin in the center
Mom's Spritz Cookies - I decorate mine w/ a cinnamon candy
Different Shapes & Patterns
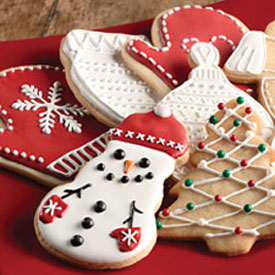
Sometimes finishing a cookie is as simple as shaping it in a different way. Food historians trace the artistic element of cookie making back to Medieval Germany where Lebkuchen (gingerbread) was crafted into fancy shapes using carved wooden molds and decorated with sugar. The story of "Hansel and Gretel " published with Grimm's Fairy Tales in 1812 inspired German gingerbread cookie Christmas cards. During the 17th century, Dutch and German settlers introduced cookie cutters, decorative molds, and festive holiday cookie decorations to the United States.
Today rolled cookie dough is cut-out with cookie cutters or simply cut in every imaginable way with a knife or pastry wheel. While cut-out cookies are generally made for the holidays because of the work involved decorating them, during the rest of the year there are simpler, easier ways to decorate cookies with patterns. Cookie dough that is stiff enough to roll into a ball can be flattened using a fork creating a crisscross pattern such as with Peanut Butter Cookies, or flattened with a cookie stamp (see below) leaving the stamps design on the top of the cookie.
Recipes:
An imaginative cookie for Christmas shapes the dough into little cute mice adding interest to the cookie platter: Almond Cookie Mice
Also see History of Cut-out Cookies
Cookie Presses
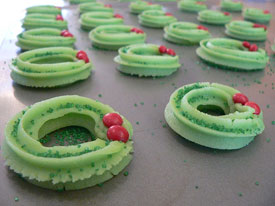
Stiff and buttery cookie dough, as used when making Spritz cookies, is pressed through metal or plastic templates into bite size and differently shaped cookies.
Recipes:
Cookie Stamps and Molds
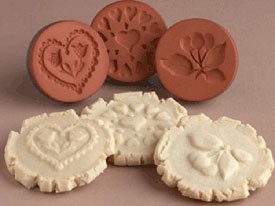
A ball of dough is pressed into a mold with an image. The best dough recipe to use with these stamps are ones with little or no leavening, so it won't puff, losing the image stamped on its surface.
One of the earliest recorded forms of cookie mold decorating is the Springerle, and the oldest known springerle mold is housed at the Swiss national museum in Zurich, Switzerland. This round-shaped mold was carved from wood in the 14th century and pictures the Easter Lamb.
Cookies on a Stick
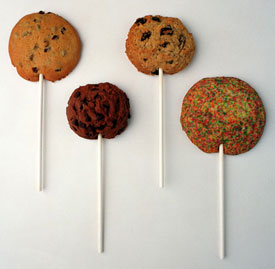
Rolled and cut out (sugar cookies) or drop cookies (chocolate chip, etc.) can be baked on a stick. If making rolled, roll them out about 1/2 inch. You'll also want to choose a cookie recipe that will not spread too much when it bakes, or your cookies will be too thin to stay on their sticks. To control the spread of your cookies, take these steps:
- Use vegetable shortening rather than butter in your recipe. Do not use margarine.
- Refrigerate the cookie dough before shaping and again before baking.
- Do not grease the cookie sheets so the cookies won't spread. Use parchment paper, or an ungreased cookie sheet instead.
Make sure that the sticks used in your cookie recipe are long enough for the purposes of your bouquet. Always put the sticks in BEFORE baking. Gently push the sticks or skewers far enough into the cookie so they will stay firmly planted and are covered in dough. Don't wiggle them as you do because you will enlarge the holes. Press extra dough on top of the cookie stick before baking.
Right after you place the stick, prop the end of it so they stay parallel to the cookie sheet. Make a ball of aluminum foil, and flatten one side by pressing it into the countertop. Then make an indentation across the top with a stick you're not using, where you will lay the end of the stick used in the cookie dough.
Watch the baking time carefully - if you've made large cookies, the baking time will increase by 5 to 10 minutes, but every cookie is different so watch carefully. Remove the cookies from the pan with a spatula; don't handle them by their sticks until they're completely cool.
Cookies on a Stick are popular for making "cookie bouquets." See the Valentine's Day cookie bouquet below.
II. Decorate Cookies After Baking AND Cooling
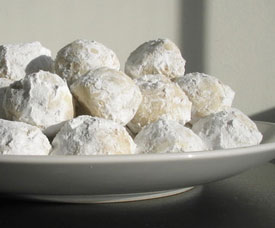
Sugars
The most basic way to finish a cookie is with sugar.
Powdered Sugar: Powdered sugar covered cookies aren’t always the most tidy to eat, but tasty none the less. These cookies go by so many names, Russian Tea cakes, Mexican Wedding Cakes, Snowballs, and so on. These cookies require at least two dustings of powdered sugar to complete. The cookies are baked until just set, then rolled while warm in powdered sugar, then rolled again after they have cooled. With the first rolling, the powdered sugar will melt and create a tasty icing and a surface to stick on, then a powdery coating is added with the second rolling.
Powdered sugar can also finish a sandwich cookie. Roll out your favorite butter cookie recipe, then cut out small holes in half of the cutouts. Bake and cool. Coat the cookie half sides that have holes with powdered sugar. Sandwich them together with your favorite preserves.
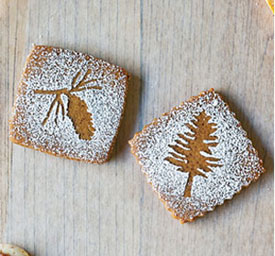
Stenciled Cookies in the reverse
Stencil Patterns with Sugar: For patterns, use a stencil or paper doily and place over a freshly frosted cookie. Lightly sprinkle with powdered sugar, colored sugar or baking cocoa, using a small sieve. To make a stencil, fold a small piece of waxed paper into quarters, then in half, making a triangle. Cut shapes out of the folds and point. Unfold to use as a stencil. Sometimes a thin icing is painted over the stencil before the sugar is sprinkled on. The stencil is then moved.
The picture to the left shows stencils used in the reverse. Instead of dusting through the holes in a stencil such as a snowflake, here a solid shape is placed on the cookie and the area around the shape is dusted with the sugar.
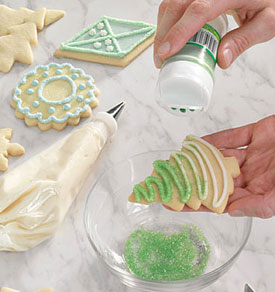
Flocking: This process creates a sparkling effect on the tops of cookies. TO DO: Make a batch of Safe Royal Icing (if you wish to eat the cookies). While icing is still soft, hold the cookie over a baking sheet, and sprinkle it liberally with sanding sugar—a large-grain decorating sugar. Let the cookie sit for 30 minutes before shaking off excess sugar. Allow it to dry for several more hours before gently removing stray crystals with a soft pastry brush.
Paint Patterns with Colored Sugar: Use a paintbrush to paint patterns on baked cookies with light corn syrup, then dip in colored sugar or sprinkles.
Use Piping Gel to Add Sparkling Sugar to Your Cookies: For a festive look, you can top your cookie or the areas to be decorated with clear piping gel. Then, while still wet, sprinkle colored sugars or sparkling sugar onto it. Piping gel can be also flavored with concentrated flavoring oils. Piping gel can also be used with a stencil.
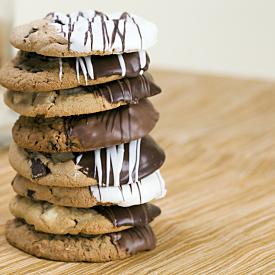
Drizzle or Dip in Melted Baking Chocolate or Chocolate Chips: Before starting, place plain, cooled cookies or bars on a cooling rack that is set over a parchment or waxed paper covered sheet pan. To do, dip a regular eating fork into melted chocolate, allowing the first large drop of chocolate to drip back into the saucepan. Then using back-and-forth motions, drizzle chocolate over cookies. Another way to drizzle melted chocolate is to use a plastic bag. Fill the bag with icing, cut off the corner and gently squeeze chocolate onto cookies in straight lines, zigzags, spirals or squiggly lines.
A fancy way to decorate with chocolate is to partially dip a cookie, one-third to one-half, into melted baking chocolate or chocolate chips.
Optionally, dip the other half of the cookie after the first half has dried. I freeze mine for 15 minutes to harden the chocolate before dipping again. I then dip the undipped side. (Try to hold the cookies on their sides; do not to touch the top of the previously dipped chocolate with your fingers or they will melt it and mar its surface.) Place dipped cookie on waxed paper until chocolate is firm.
Make multiple chocolate layers by dipping a single-dipped cookie into a second type of chocolate (after first chocolate is firm and frozen for 15 minutes), leaving 1/4 inch of first chocolate showing. For example, first dip the cookie in white chocolate and then in semi-sweet chocolate.
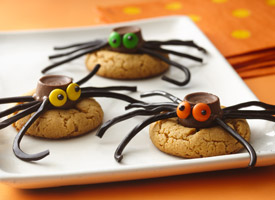
Candy, Dragees, Fruit & Nuts: Cookies can be finished with a variety of items such as candy corn, gumdrops, nuts, raisins, candied fruit, miniature chocolate chips, sprinkles and colored sugars. If using an icing or chocolate base, make sure it has not set before placing candy, fruit and nuts. In place of icing, you can use a drop of corn syrup or piping gel to attach decorations such as candies and nuts to baked cookies.
- Cut unwrapped rectangular chocolate mints or rectangular toffee crunch candies diagonally in half from corner to corner to form triangles. Arrange triangles in fan shape, pinwheel or random pattern on frosting or melted chocolate on cookies or bars.
- Place milk chocolate stars, unwrapped milk chocolate kisses, unwrapped chocolate-covered peanut butter cup candies or purchased chocolate leaves or other shapes on glazed or frosted cookies or bars. Chocolate kisses and peanut butter cups can be placed directly on the cookies while still hot from the oven. Some of the bottom chocolate will melt and adher the candy to the cookie.
- Sprinkle crushed hard peppermint candies, crushed lemon drops, crushed peanut brittle or coarsely chopped candy bars over glazed or frosted cookies or bars.

Piped Icing, Buttercream or Flooding Techniques:
The next step in difficulty is to take your icing and pipe it onto the cookie. The same techniques are used as for cake decorating, but only on a smaller scale when decorating cookies. It doesn’t take complex decorating skill, a simple open tube or even an airtight bag with the corner slightly snipped can be used to pipe lines and dots.
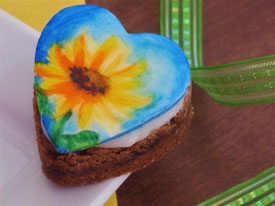
Painting with Color: Paint baked and cooled cookies in all sorts of colors.
- Luster Dusts and Petal Dusts may be mixed with alcohol (white spirits) or lemon oil for painting. Add just enough alcohol or lemon oil to achieve a paint consistency. Luster dusts produce a shimmery, sheen finish and are available in several colors including shades of metallic gold and silver. Petal Dusts are used to achieve deeper hues with a matte finish.
- Paint with Tinted Piping Gel: Place 2 teaspoons of piping gel in a small container. Dip the end of a toothpick (use a fresh one every time you dip) in either paste or gel colors. Dip the end in the piping gel, swipe a very small amount (colors are very concentrated) of color and stir. Only add enough until the right color is reached. Place cookie on waxed paper or wire cake rack and let dry. (Piping gel available from http://www.wilton.com or any cake decorating store).
- Paint with decorating pens: Decorating pens called Foodoodlers, are fun to use. They are filled with food colors and can be used on any hard surface, such as cookies, etc. There are also Candy Writers, great for cookie decorating with colored chocolate. I have even used tinted colors packaged in small tubes, available from the grocery store.
- Paint Cookies with Egg Whites and Food Coloring: Bake the Cookie Recipe and cool completely.
Use only pasteurized powdered egg whites (Purchase from the grocery store. DO NOT use raw egg whites if consuming cookies), dissolve 1 to 2 egg whites worth as directed on the package. Whisk the egg white(s) until frothy.
Add enough powdered sugar to make a thin glaze. Tint with small amounts of food color or paste colors in a small bowl. (Dip a fresh toothpick every time).
Use a paint brush to paint on the colors. Place cookie on waxed paper or wire cake rack and let dry.
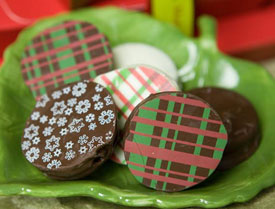
Using Transfer Sheets to Decorate Cookies
See Transfer Sheets for Decorating Cookies, Chocolates and Cakes
Chocolate Transfer Sheets consist of a sheet of thin acetate that is embossed with an edible ink comprised of cocoa butter and powdered food coloring ~ that’s all. The sheets are available in hundreds of patterns: from animal prints and floral designs, to mod geometrics and celebratory text like “Happy New Year”. Transfer sheets can be cut down to fit any chocolate dipped confection, or can be cut and coated with chocolate to wrap around a cake. Cookies need to be coated with chocolate before applying the transfer sheet.
