No-Bake Cheesecake
From https://sallysbakingaddiction.com/:
This is truly the most perfect and easy no-bake cheesecake. By following this no-bake cheesecake recipe, you’ll be gifted with a smooth and creamy dessert that sets up beautifully in the refrigerator. Unlike regular cheesecake, no-bake cheesecake isn’t overly heavy. It’s lightly sweet and perfectly refreshing!
No-bake cheesecake is exactly what the name suggests. The graham cracker crust and cheesecake filling never see the inside of the oven, so it’s a fantastic dessert when the weather’s warm or when your oven is crowded. Or when you don’t feel like baking.
This is a no-bake graham cracker crust. It’s thick, crunchy, and sets up beautifully… even without baking! There are only 3 ingredients required: graham cracker crumbs, melted butter, and brown sugar. https://sallysbakingaddiction.com/ usually uses granulated sugar in graham cracker crust, but prefers brown sugar in this recipe. The moisture in brown sugar helps solidify the crust. Pack it into a 9-inch springform pan, then place in the freezer while you prepare the filling.
Beating heavy cream into stiff peaks most important step in this entire recipe and *the secret* to a thick no-bake cheesecake filling. Add a little sour cream for that trademark tangy cheesecake flavor. After refrigerating, decorate with whipped cream, lemon curd, strawberry sauce, raspberry sauce, blueberry sauce, fresh berries, cherry pie filling, chcolate ganache, and/or salted caramel.
You can freeze the cheesecake to enjoy at a later time. After it sets in the refrigerator, wrap the whole pan (you can remove the sides if desired) in 1 layer of plastic wrap, then 1 layer of aluminum foil. No-bake cheesecake freezes wonderfully for up to 3 months. Thaw in the refrigerator for about 8 hours, then slice and serve.
No-Bake Cheesecake
from https://sallysbakingaddiction.com/
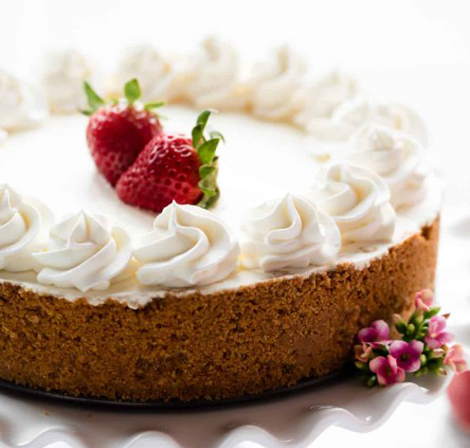
Made in a springform pan
Graham Cracker Crust
2 cups (240g) graham cracker crumbs (about 16 full sheet graham crackers)
1/3 cup (67g) packed light or dark brown sugar
1/2 cup (8 Tbsp; 113g) unsalted butter, melted
Cheesecake
1 and 1/4 cups (300ml) heavy cream or heavy whipping cream
24 ounces (678g) full-fat brick cream cheese, softened to room temperature
1/2 cup (100g) granulated sugar
2 Tablespoons (15g) confectioners’ sugar
1/4 cup (60g) sour cream, at room temperature
2 teaspoons lemon juice
1 teaspoon pure vanilla extract
Make the crust: Stir the graham cracker crust ingredients together. Pour into a 9-inch springform pan or 10-inch springform pan and pack in very tightly. The tighter it’s packed, the less likely it will fall apart when cutting the cheesecake. I recommend using the bottom of a measuring cup to pack it into the bottom and up the sides. You can watch me do this in the video above. Freeze for 10–20 minutes as you prepare the filling. [Bake briefly?]
In her recipe for mini no-bake cheesecakes, she says "To really ensure that these tiny crusts set up properly, I recommend a quick 5 minutes in the oven. Now I know these are NO-BAKE—and the filling still is—I simply found that the crust is sturdier after 5 minutes of baking."
For these mini cheesecakes, she uses the same crust ingredient amounts (the crusts come only halfway up the cheesecake), but cuts back the cheesecake batter a little. She makes these in 2 muffin tins using cupcake liners (or they won't come out). And "As long as you chill the mini no-bake cheesecakes for long enough, the wrappers will neatly pull away from the filling. The cheesecakes do begin to soften up when at room temperature, so as long as you unwrap them shortly after taking them out of the refrigerator, you’re fine."
Make the filling: Using a hand mixer or a stand mixer fitted with a whisk attachment, whip the cold heavy cream into stiff peaks on medium-high speed, about 4–5 minutes. Set aside.
Using a hand mixer or a stand mixer fitted with a whisk or paddle attachment, beat the cream cheese and granulated sugar together on medium speed until perfectly smooth and creamy. Scrape down the sides and up the bottom of the bowl with a silicone spatula as needed. Add the confectioners’ sugar, sour cream, lemon juice, and vanilla extract. Beat for 2–3 minutes on medium-high speed until smooth and combined. Make sure there are no large lumps of cream cheese. If there are lumps, keep beating until smooth.
Using your mixer on low speed or a silicone spatula, fold the whipped cream into the cheesecake filling until combined. This takes several turns of your silicone spatula. Combine slowly as you don’t want to deflate all the air in the whipped cream.
Remove crust from the freezer and spread filling into crust. Use an offset spatula to smooth down the top.
Cover tightly with plastic wrap or aluminum foil and refrigerate for at least 6–8 hours and up to 2 days. For best results, 12 hours is best. I chill mine overnight. The longer refrigerated, the nicer the no-bake cheesecake will set up.
Use a knife to loosen the chilled cheesecake from the rim of the springform pan, then remove the rim. Using a clean sharp knife, cut into slices for serving. For neat slices, wipe the knife clean between each slice.
Serve cheesecake with desired toppings (see Note). Cover and store leftover cheesecake in the refrigerator for up to 5 days.
Serves 10-12
Easy No-Bake Cheesecake
from https://www.seriouseats.com/, Stella Parks
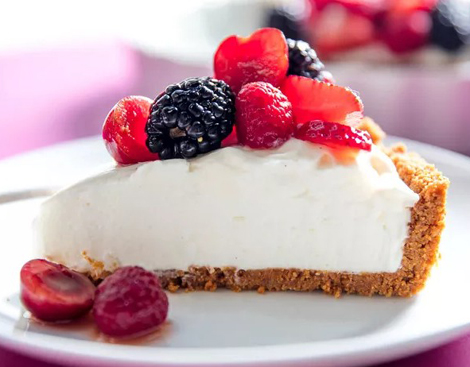
Made in quiche pan & topped with fresh fruit
Sure, there are times I want a classic cheesecake, but there are also times at the height of summer when you couldn't pay me to fire up the oven. Yet the middle of summer is just when I could really go for a slice of cheesecake, all tangy and cool and loaded with fresh fruit. So when you're ready to kick back and keep cool, remember that cheesecake is beautiful in any form.
Most no-bake cheesecake recipes either incorporate gelatin for body, which can quickly veer into a weirdly panna cotta-like territory, or else fall back on what I call the Key lime pie method. As you might expect, this technique relies on a chemical reaction between citrus juice and sweetened condensed milk to thicken the filling. It's a great, cheesecake-y twist on Key lime pie, but far too citrusy and acidic to scratch the itch when I'm craving cheesecake.
This recipe works great with your favorite graham cracker, but after much experimenting, I've found that the stronger spices and deep caramel flavor of Biscoff cookies taste even better in a no-bake crust. You can pick up a package of Biscoff at the store, or make your own if you don't mind firing up the oven.
For the Crust:
8 3/4 ounces graham cracker or Biscoff crumbs (see note), store-bought or homemade (about 2 cups; 250 g)
2 1/2 ounces unsalted butter, melted (about 5 tablespoons; 70 g)
Kosher salt, to taste
For the Filling:
16 ounces plain, full-fat cream cheese, (2 (8-ounce) packages; 455 g) (preferably Philadelphia brand; see note)
5 1/4 ounces sugar (about 3/4 cup; 150 g)
3/4 ounce fresh juice from 1 lemon (about 4 1/2 teaspoons; 20 g)
1/4 teaspoon vanilla extract
1/8 teaspoon Diamond Crystal kosher salt; for table salt, use about half as much by volume or the same weight
12 ounces heavy cream (about 1 1/2 cups; 340 g)
To Serve:
12 ounces fresh fruit (about 2 cups; 340 g), washed and dried
For the Crust: Combine cookie crumbs and melted butter in a small bowl, then stir in a pinch of salt to taste. Sprinkle into a 9-inch tart pan or pie plate, spread into an even layer, then compress firmly with a flat-bottomed drinking glass or measuring cup; this will naturally push the crumbs up the sides of the pan. Keep pressing until the crumbs are in a compact, even layer across the bottom and sides of the pan. Refrigerate until needed. (The crust can be made and held for a day or two if wrapped in plastic.)
For the Filling: Combine cream cheese, sugar, lemon juice, vanilla, and salt in the bowl of a stand mixer fitted with a paddle attachment. Mix at low speed to form a thick paste, then increase to medium speed until soft and smooth.
Scrape bowl and beater with a flexible spatula, then switch to the whisk attachment and pour in cream. Mix at low speed to combine, then increase to high and whip until the mixture can hold stiff peaks, 3 to 5 minutes depending on the horsepower of your mixer.
Scrape filling into prepared crust and spread into an even layer, using the back of a spoon to sculpt filling into swoops and swirls. Cover with plastic and refrigerate until the filling is firm and cold, about 6 hours or to an internal temperature of 40°F (4°C).
To Serve: Top with fresh fruit and cut into wedges with a hot chef’s knife, rinsing the knife under hot running water between slices. Carefully slide a pie server under the crust, making sure it reaches all the way to the tip of the wedge (the first slice will be the most difficult and messy to remove).
Serves 8 to 12 servings
